Overview
This guide explains how to export or back up recordings stored on a VIGI NVR's hard drive using the NVR's local GUI. Exported recordings can be played back on most media devices. There are two methods available — via the Playback page, or via the Export File page — depending on how you want to search and filter your recordings.
An external USB storage device is required to export recordings. Plug it into the USB slot on the NVR before starting. You will also need a monitor connected to the NVR's HDMI or VGA port to access the GUI.
Requirements
- VIGI NVR Any compatible VIGI NVR with recordings stored on an installed hard drive.
- Monitor Connected to the NVR via HDMI or VGA to access the local GUI.
- External storage device A USB drive with sufficient free space for the recordings you intend to export. Plug this into the NVR's USB slot before starting.
Method 1 — Export from the Playback Page
The Playback page lets you search for recordings by channel, time range, recording type, tags, and events, then export them in batches. This is the best method when you know roughly when the footage you need was recorded.
-
1
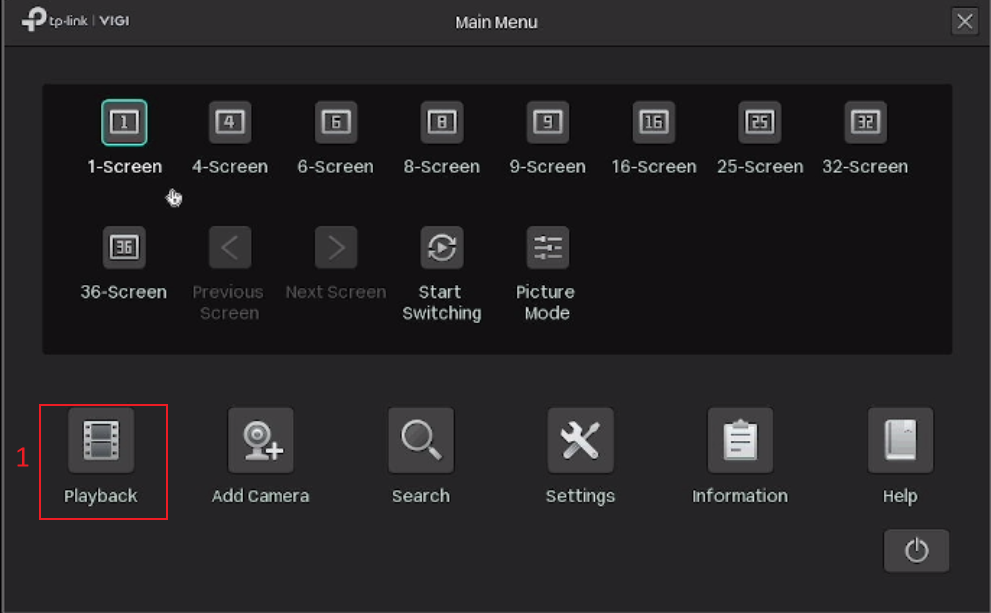
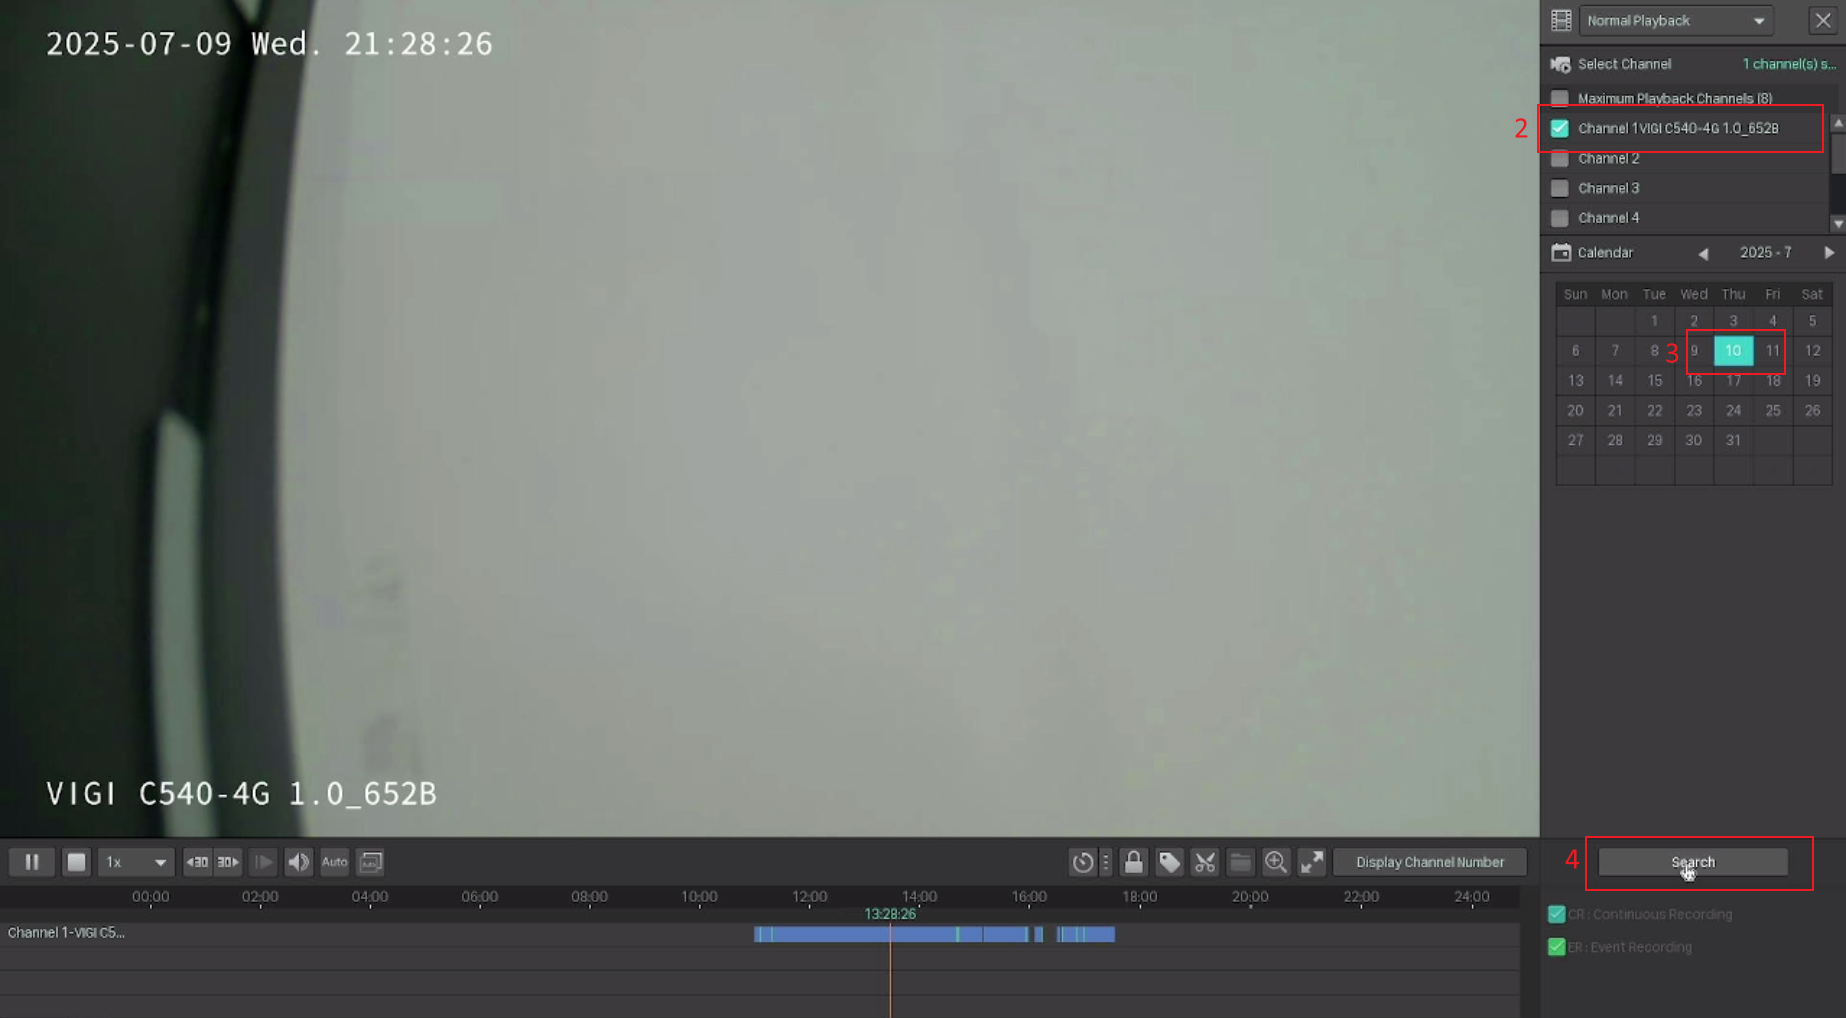
Open Playback and search for recordings. Right-click anywhere on the screen to open the Main Menu, then go to Playback. Set the playback mode, select the channels you want, and specify a time range. Click Search to find matching recordings.
-
2
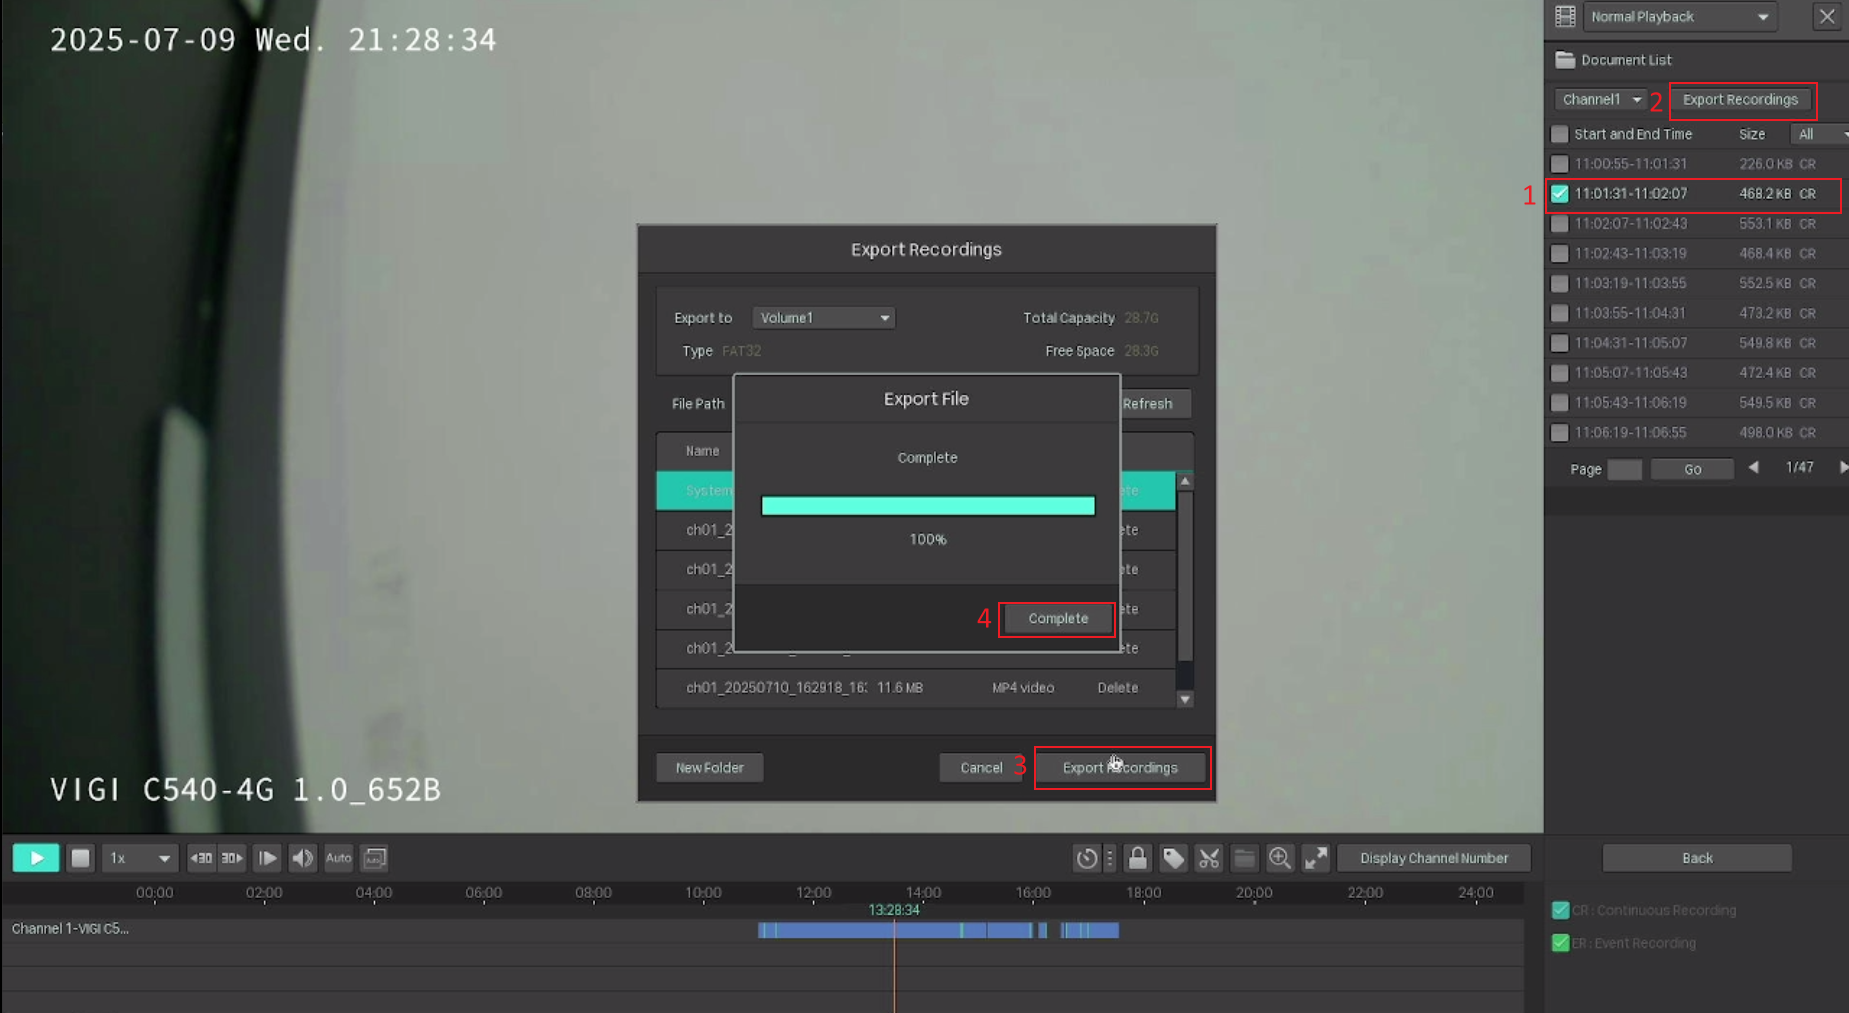
Select and export recordings. Recording files appear in the right panel. Tick the checkbox next to each file you want to export, then click Export Recordings. Choose the destination path on your USB drive and click Export Recordings again. Wait for the export to complete.
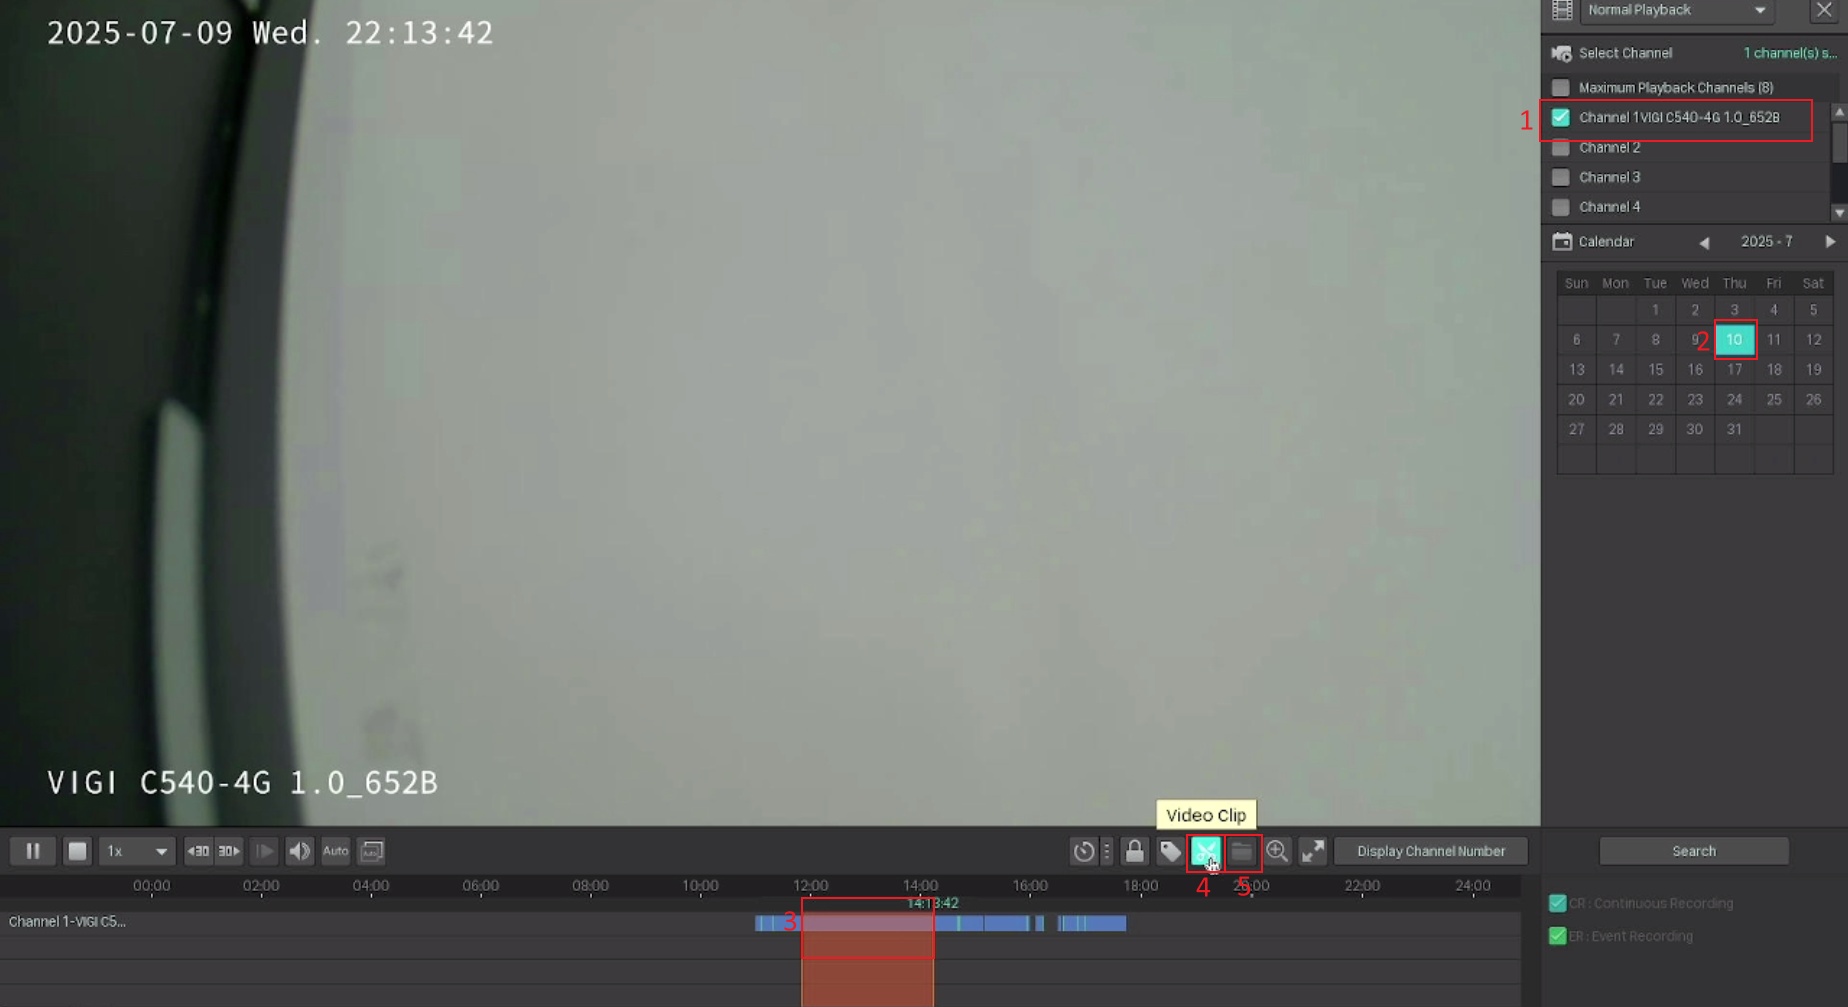
You can also export a specific segment rather than a full recording file. Click the scissors icon (Video Clip) in the Playback toolbar, select the period you want on the timeline, then click Export Clip to save just that segment.
Method 2 — Export from the Export File Page
The Export File page gives you more granular filtering options, including recording type and file lock status. Use this method when you need to filter by event type or control which files are included.
-
1
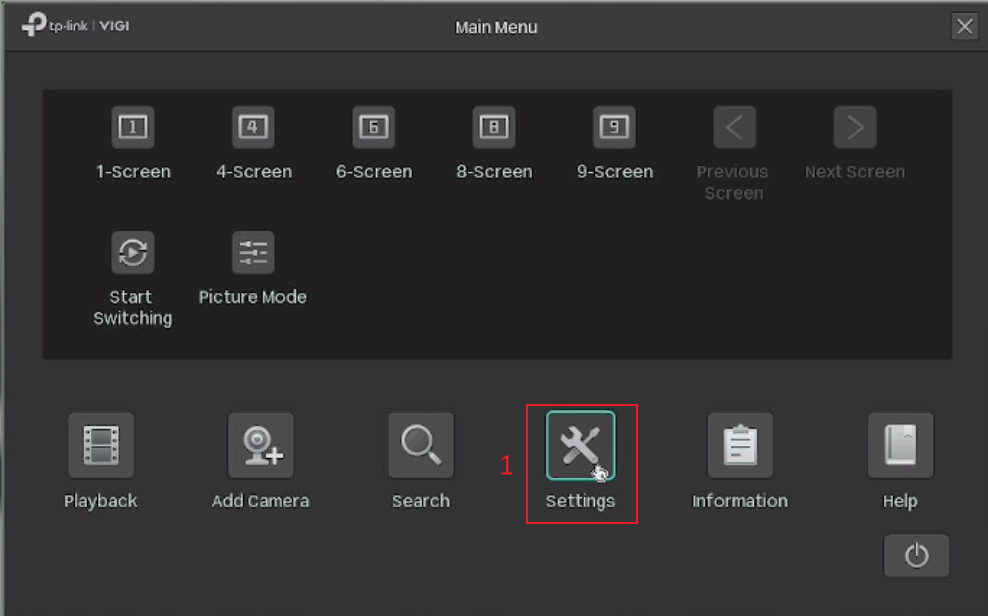
Open Export File and filter your recordings. Right-click to open the Main Menu, then go to Settings > Storage > Export File. Select the camera channel, time range, and recording type to filter the results.
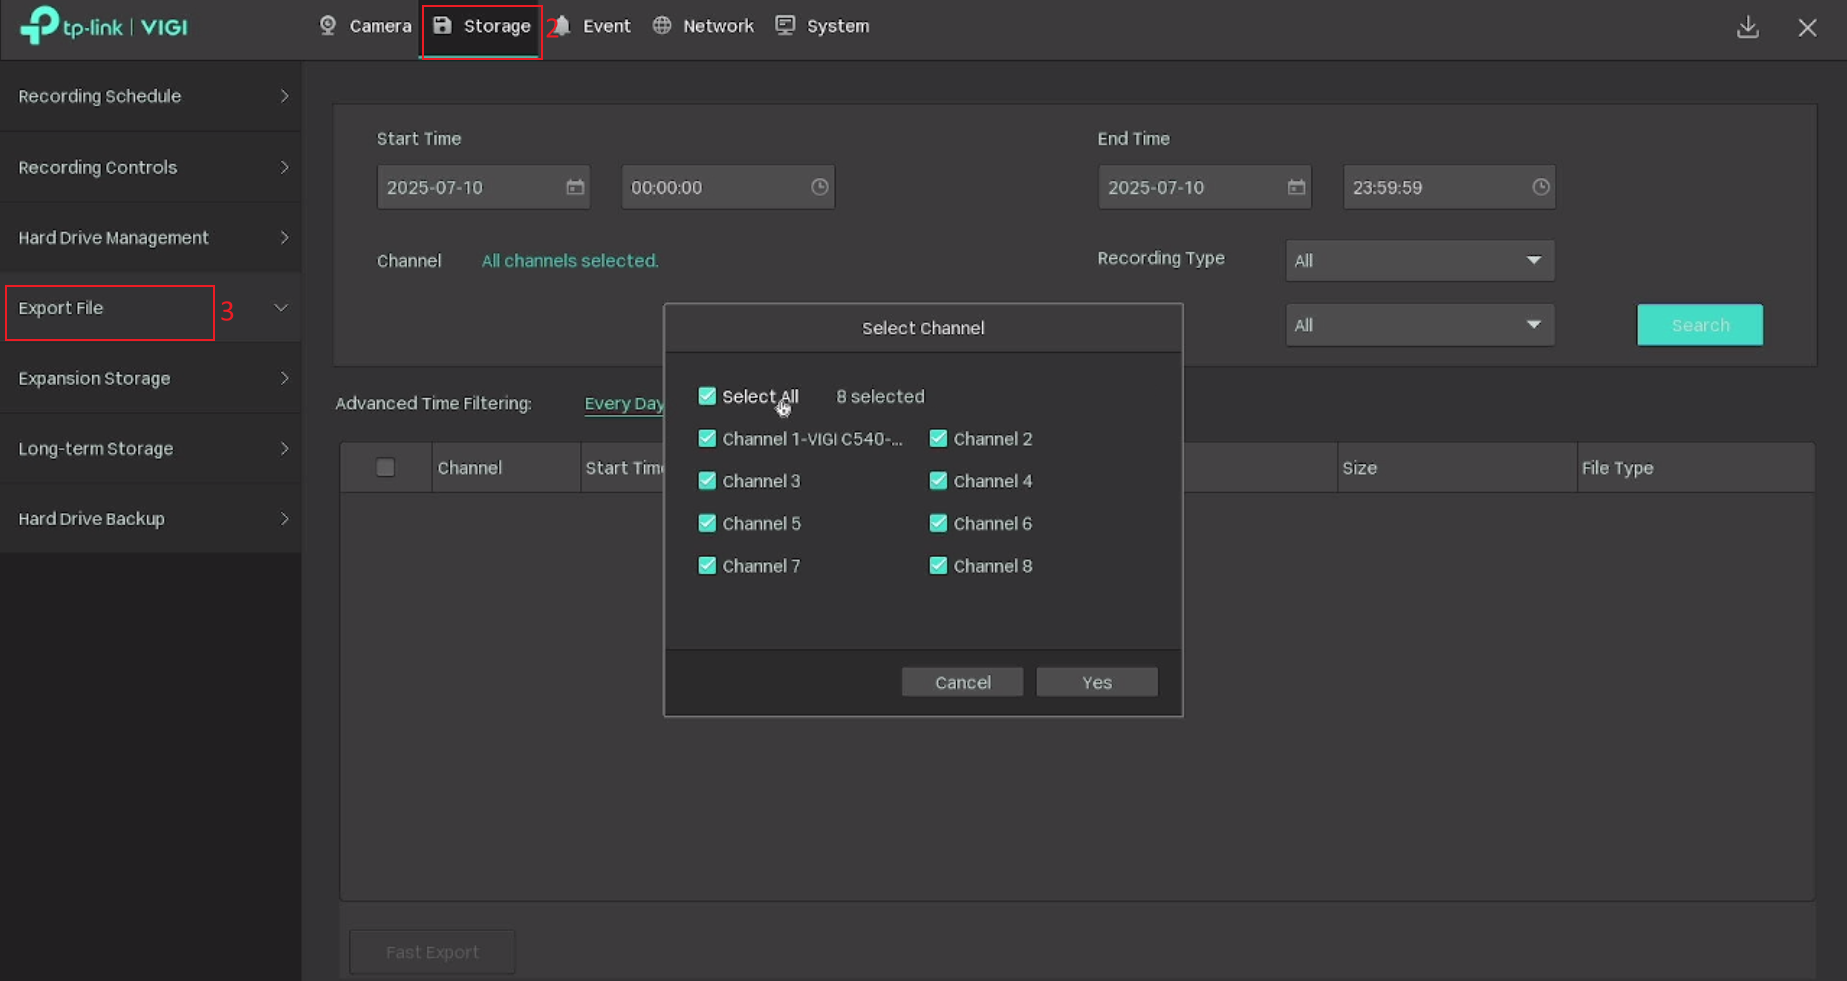
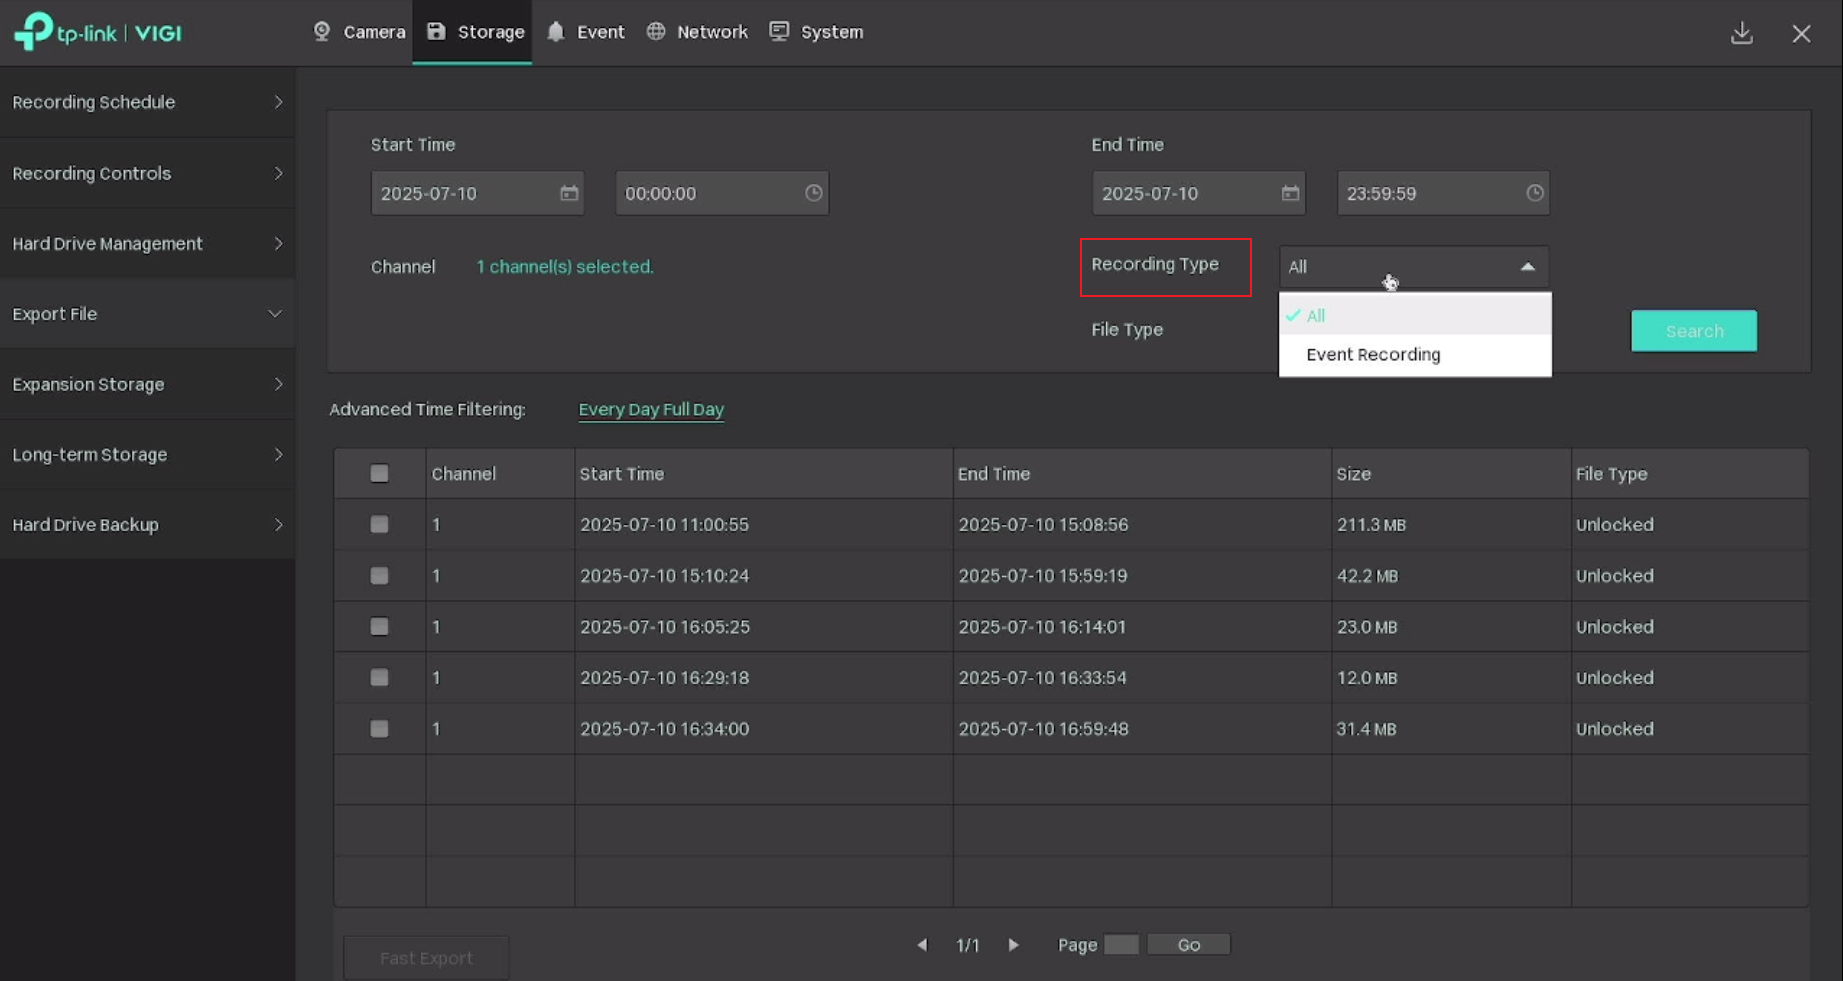
Use the Recording Type and File Type dropdowns to narrow your results further.
| Option | Description |
|---|---|
| All recordings | Exports every recording in the selected period, including both event and continuous recordings. |
| Event Recording only | Exports only recordings triggered by detected events — useful when you don't want to export all footage. |
| All files | Displays both locked and unlocked files. |
| Unlocked files | Files that will be overwritten when loop recording is enabled and storage is full. |
| Locked files | Files that are protected from being overwritten, even when loop recording is active. |
-
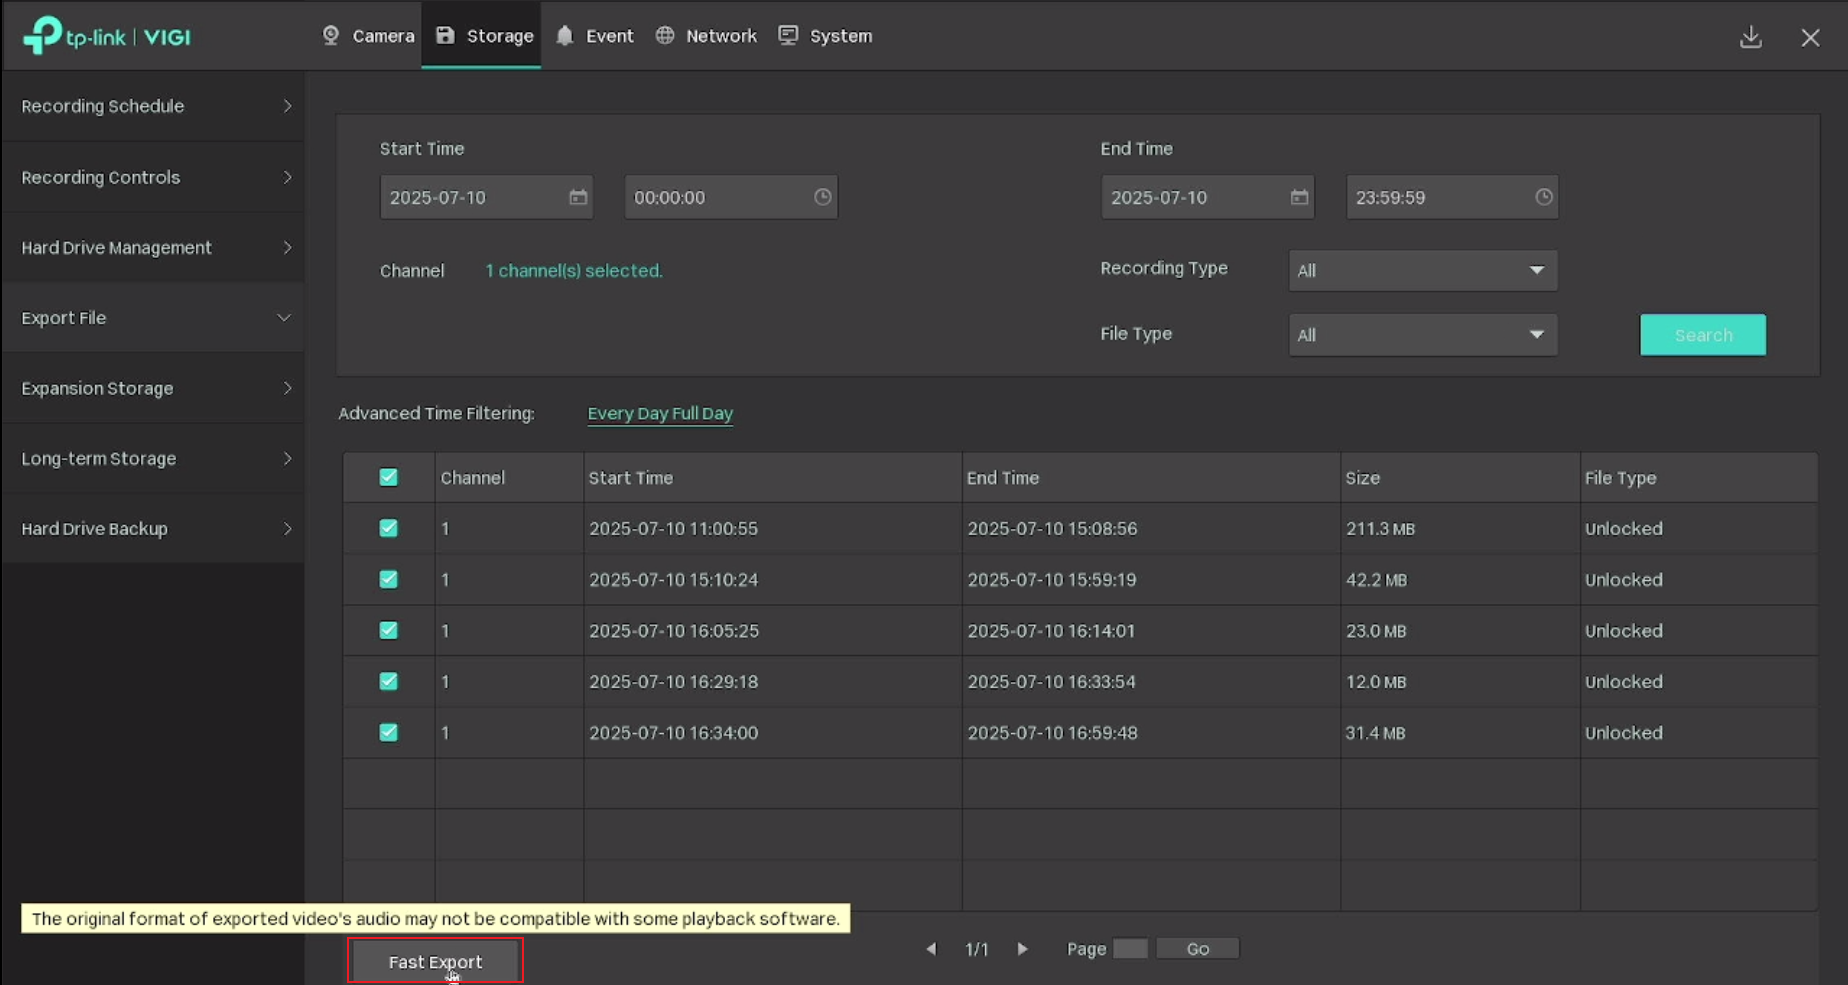
2
Select recordings and click Fast Export. Tick the recordings you want to export, then click Fast Export to begin the transfer to your USB drive.
-
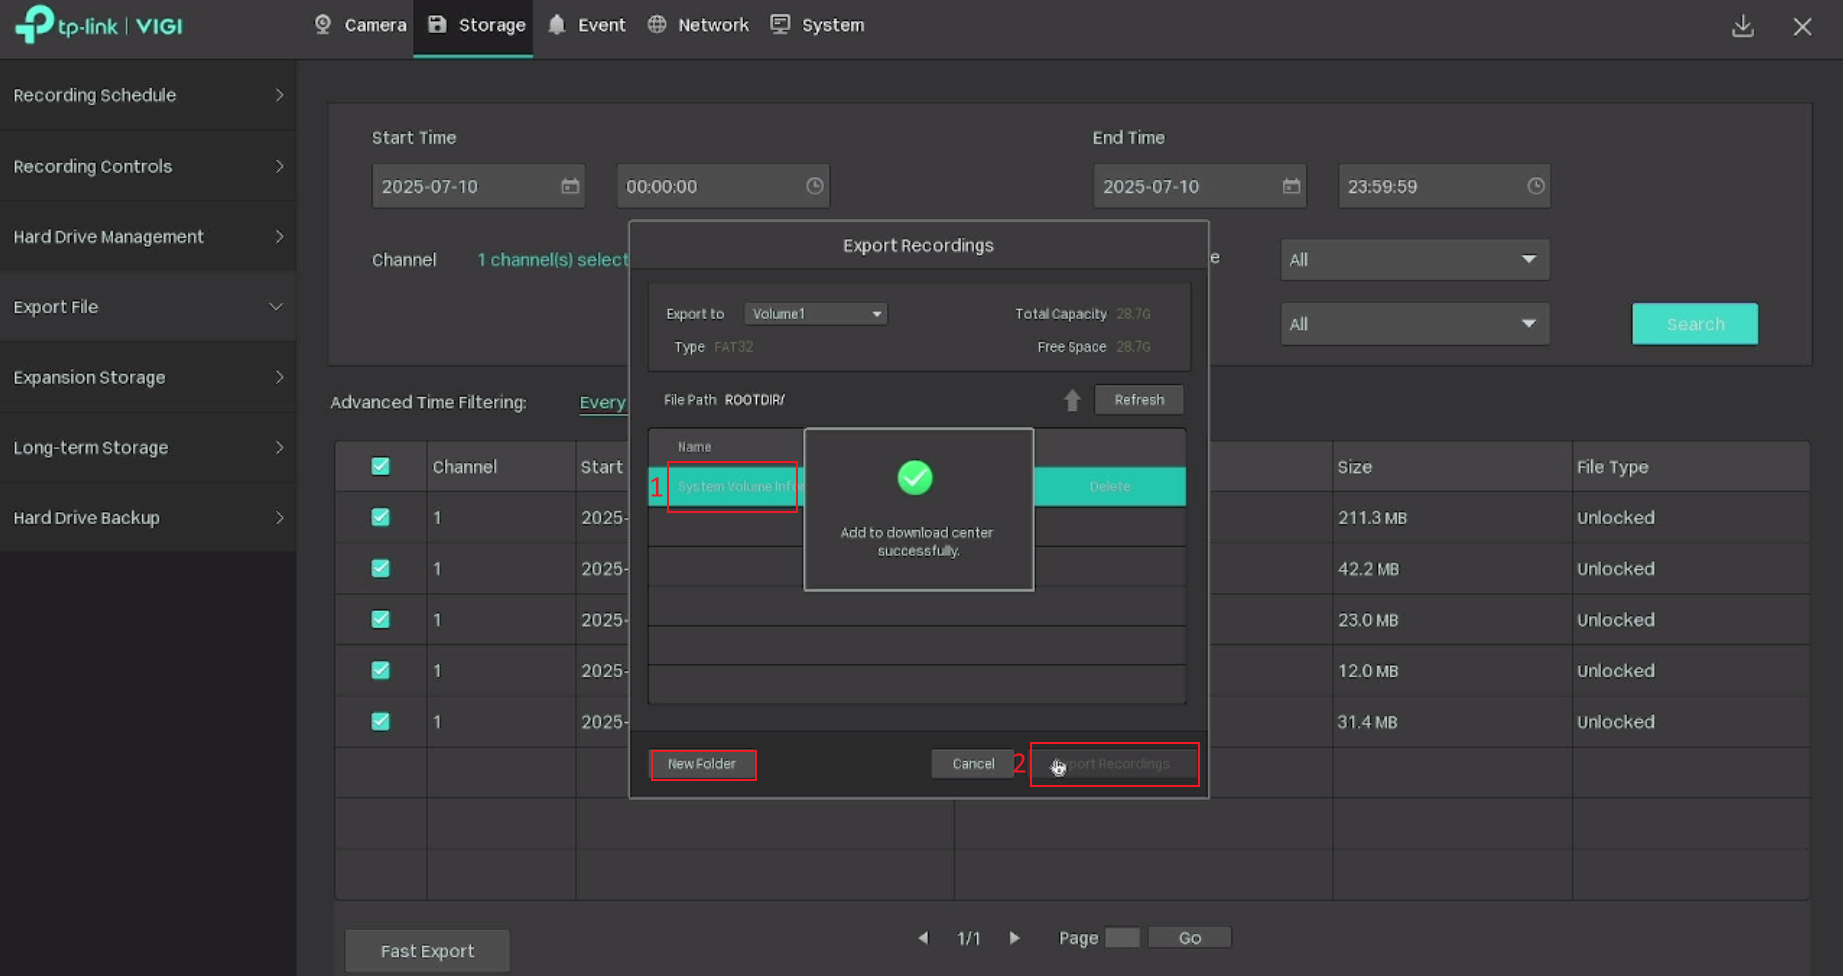
3
Choose the export destination. Select an existing folder on your USB drive or create a new one, then click Export Recordings to transfer the files.
The audio format in exported video files may not be compatible with all media players. If audio does not play back correctly, try opening the file in VLC or another player with broad codec support.
Sources & related guides
Original article: tp-link.com/us/support/faq/4615
VIGI NVR product range: tp-link.com — VIGI Network Video Recorders
TP-Link Download Center (manuals & firmware): tp-link.com/download-center
TP-Link Community (Business): community.tp-link.com/en/business/forum/584