Configure Warning Light and Alarm Sounds for IVS (Intelligent Video System) in Web Browser
- From the Home Page, go to AI > Smart Plan > IVS
- Enable IVS switch and click Next

- Click on Add Rule and Select Rule Type you wish to use

- Click Event Linkage, then select Warning Light and/or Audio Linkage.

- After adding the Audio and Warning Event Linkages, you can now select the Play Count and Audio File (Audio Linkage) or the Flicker frequency and Duration of the Warning/Strobe lights (Warning Light)

Configure Warning Light and Alarm Sounds for Motion Detection in Web Browser
- From the home page, navigate to Event > Video Detection > Motion Detection

- Select Event Linkage and Add Audio Linkage and Warning Light

- Select required Alarm Sound and Warning Light configuration

- If you need to remove one of the Event Linkages you can click on the bin icon to delete it
Configure Warning Light and Alarm Sounds for IVS from an NVR
- On the NVR, Navigate to Main Menu > AI
- Select Parameters > IVS > Trigger
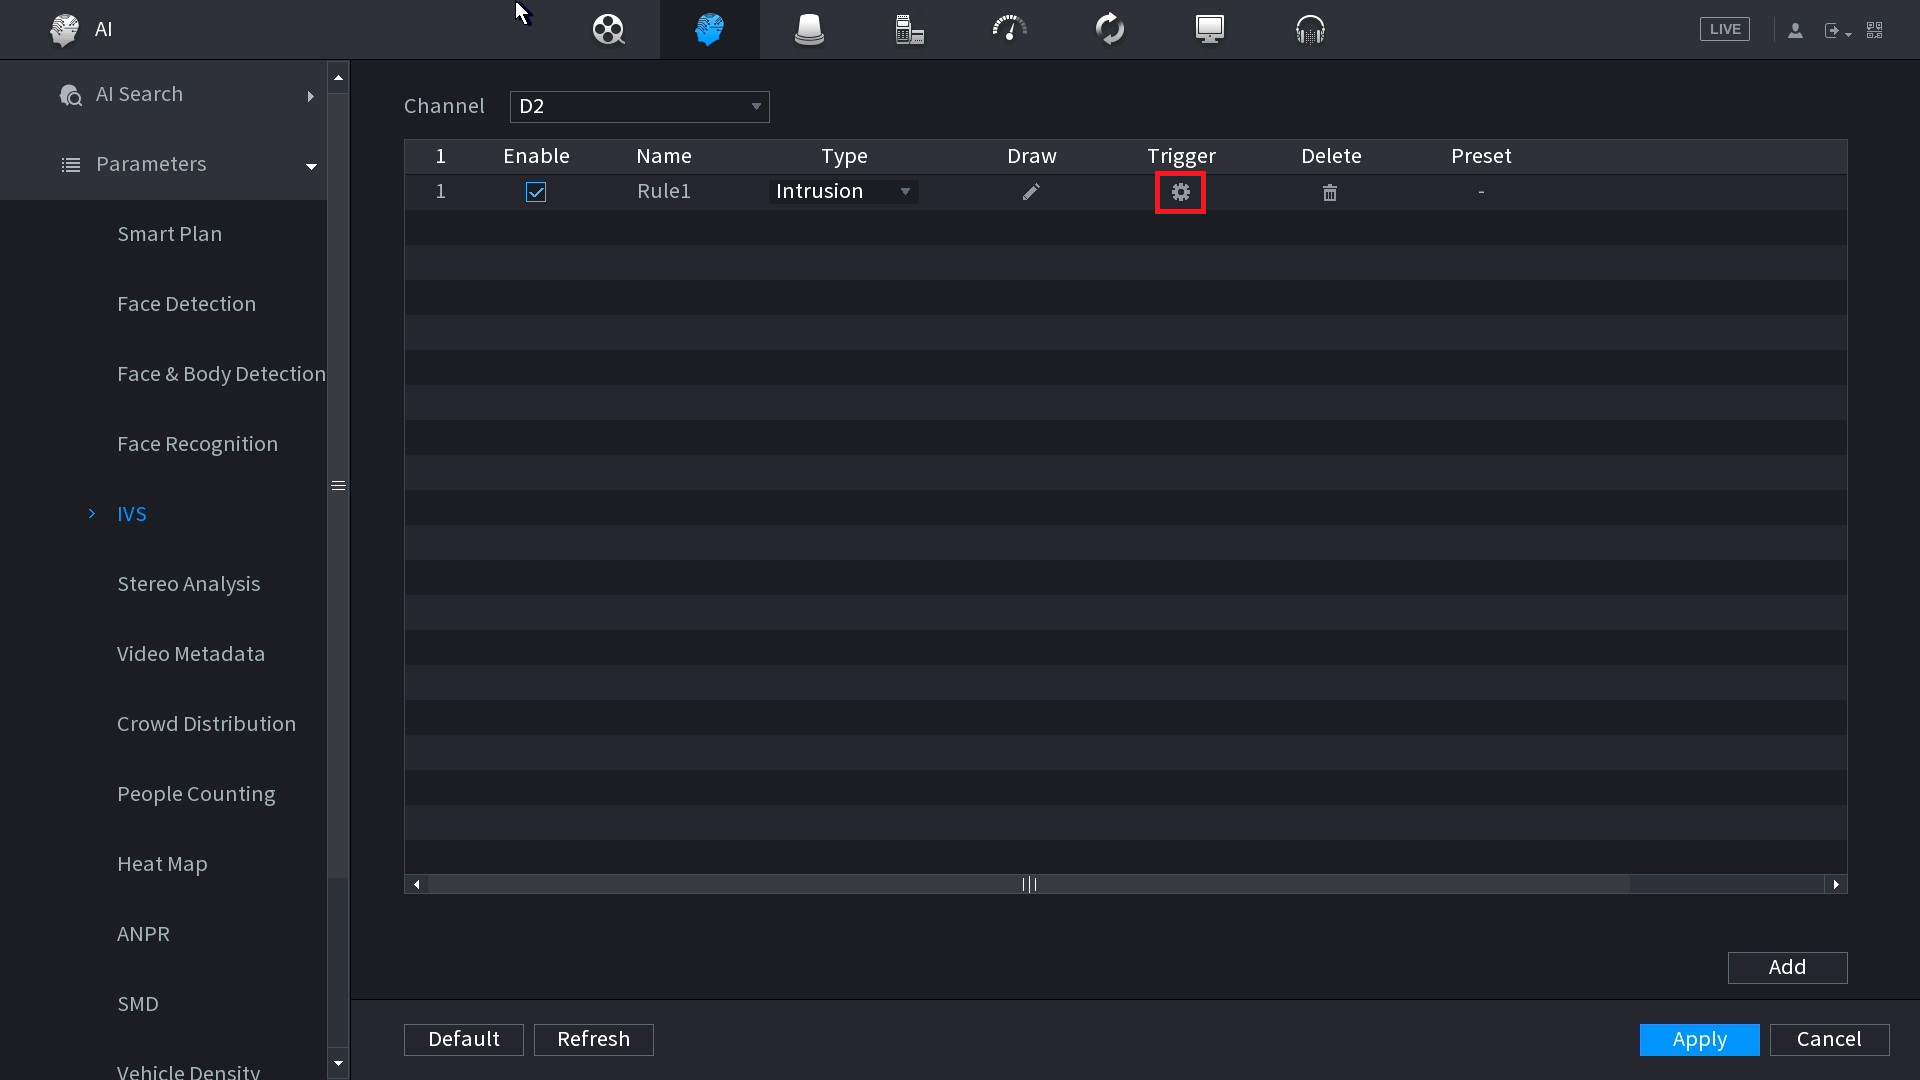
- Within Triggers, you can toggle the Audio Linkage and Warning Light on and off.

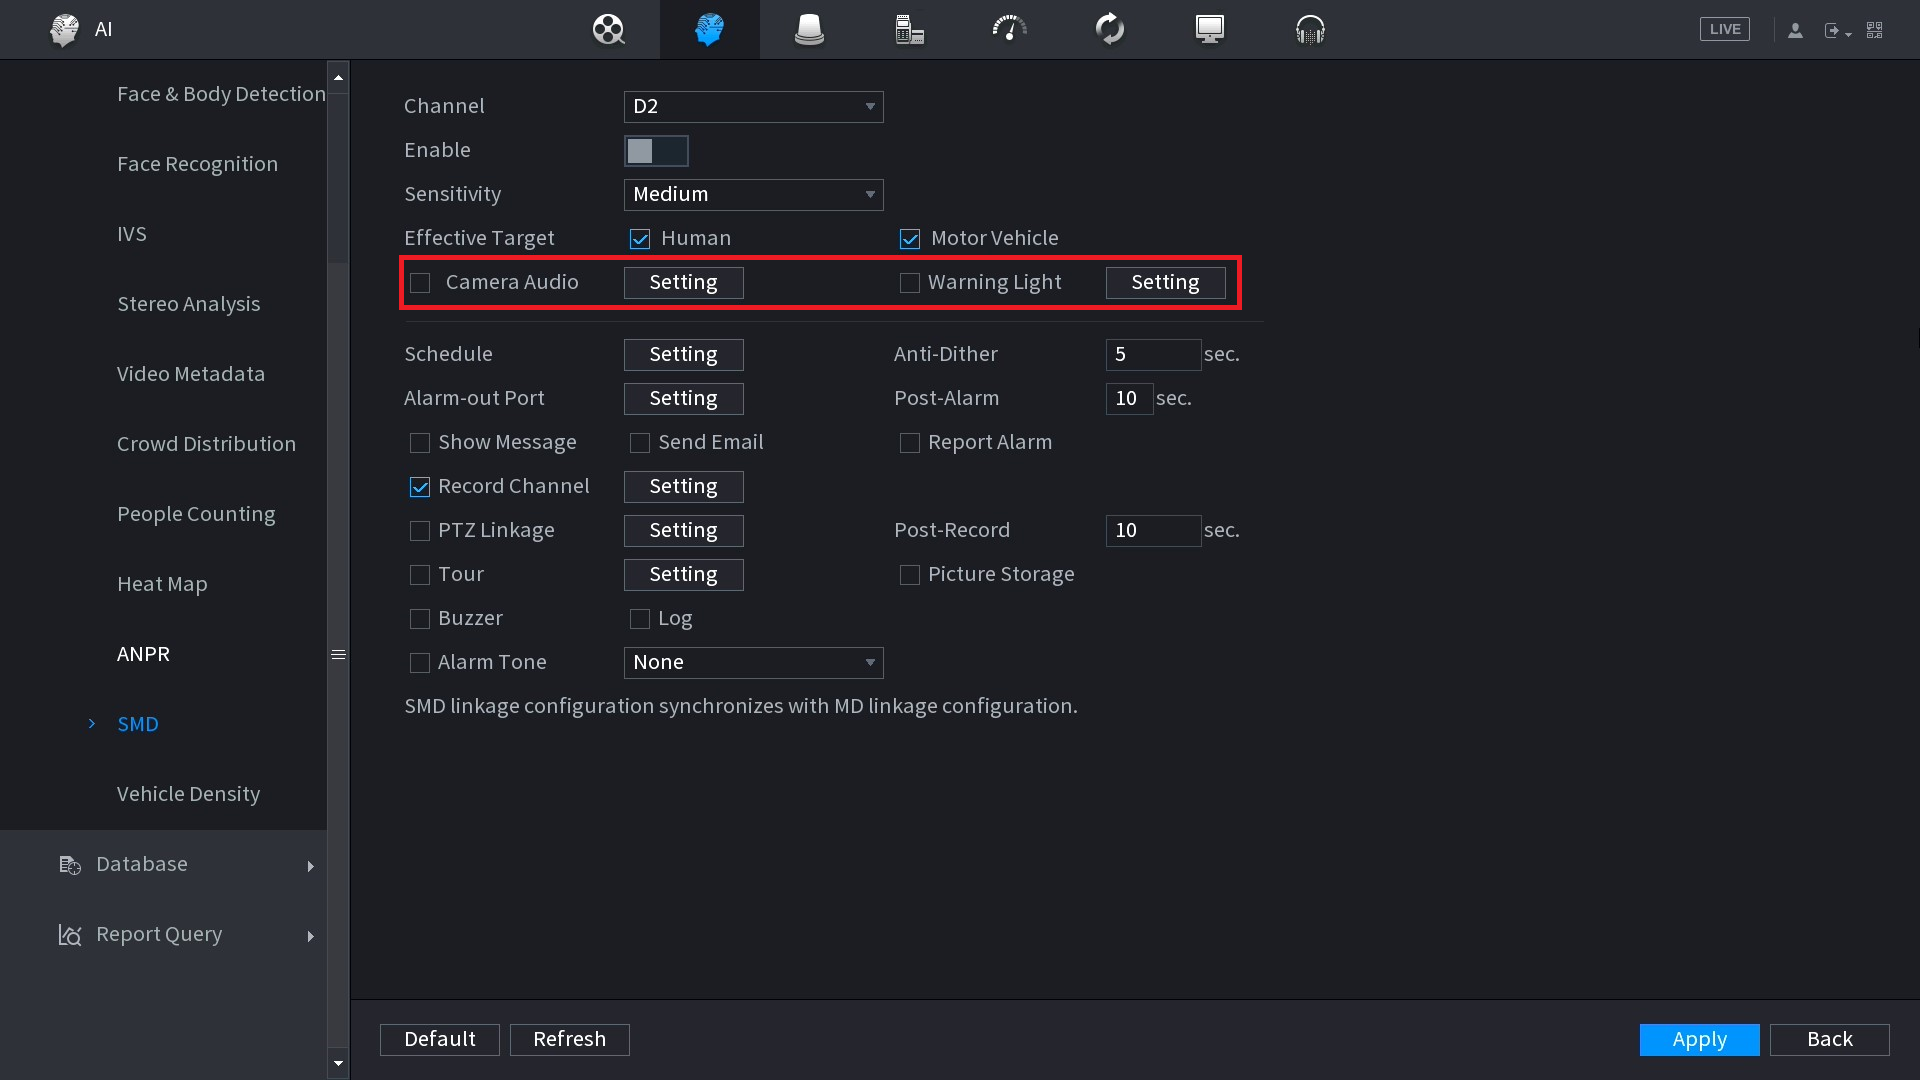
Configure Warning Light and Alarm Sounds for SMD (Smart Motion Detection) from an NVR
- Go to the Main Menu and navigate to the AI section.
- Choose Parameters and then select SMD.
- On this page, you have the option to toggle the Audio Linkage and Warning Light on and off.
ARM/DISARM Warning Light and Alarm Sounds from DMSS mobile app
The TiOC Series cameras offer the capability to deactivate its' siren and strobe temporarily. This can be scheduled, such as during Business Opening Hours, or toggled on/off through the NVR and DMSS. Additionally, it can be controlled via an Alarm Input through either the NVR or Camera, providing flexibility in managing access, for instance, allowing a manager to enter a business during closed hours.
Please note that this option will not be available on older NVR's, if you wish to find out if your NVR can perform this function, do not hesitate to contact us at help@ic.plus
- Launch the DMSS App and click on the 3 dot (...) icon adjacent to your device list on the home page. Subsequently, choose "Device Details."

- Please wait for the device settings to load; this process may take up to 10 seconds. Afterward, enable the Disable Alarm Linkage Function. *Remember that Switch Off/Grey is Armed, Switch On/Blue is Disarmed

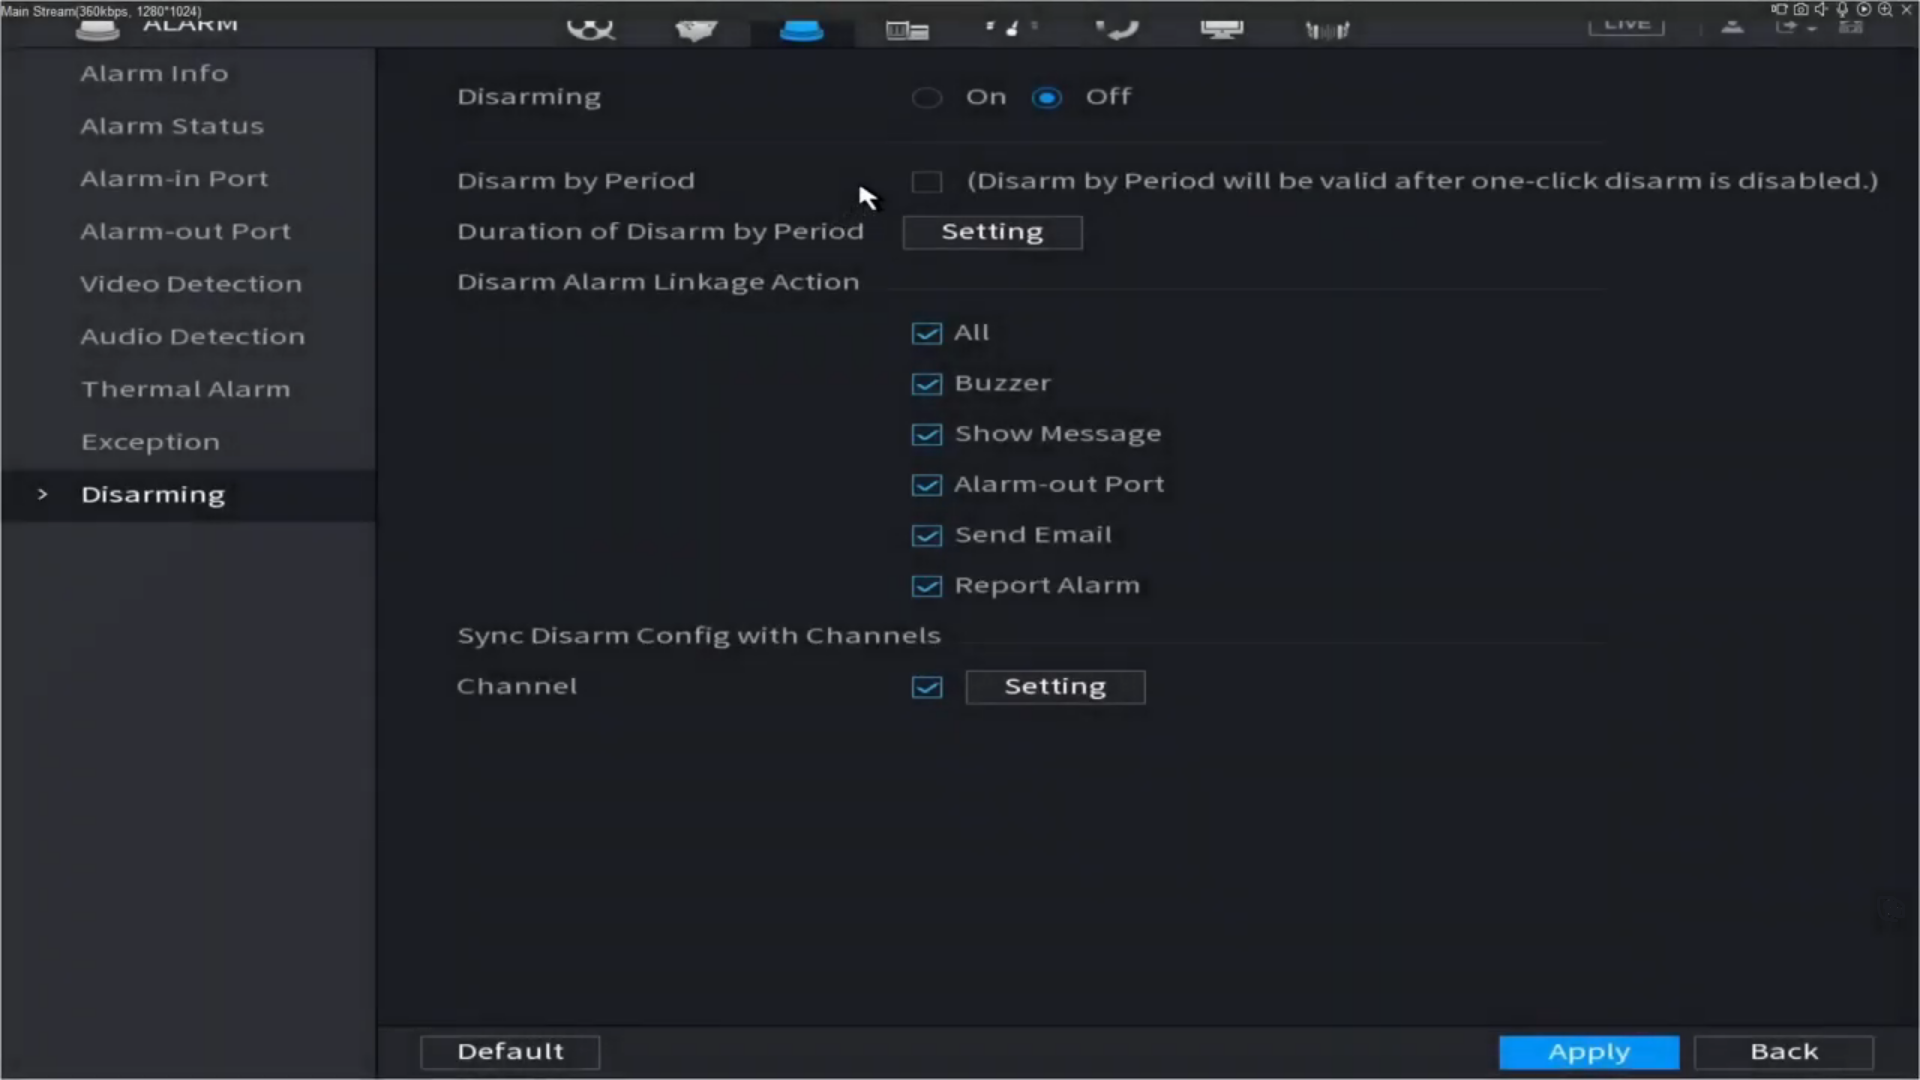
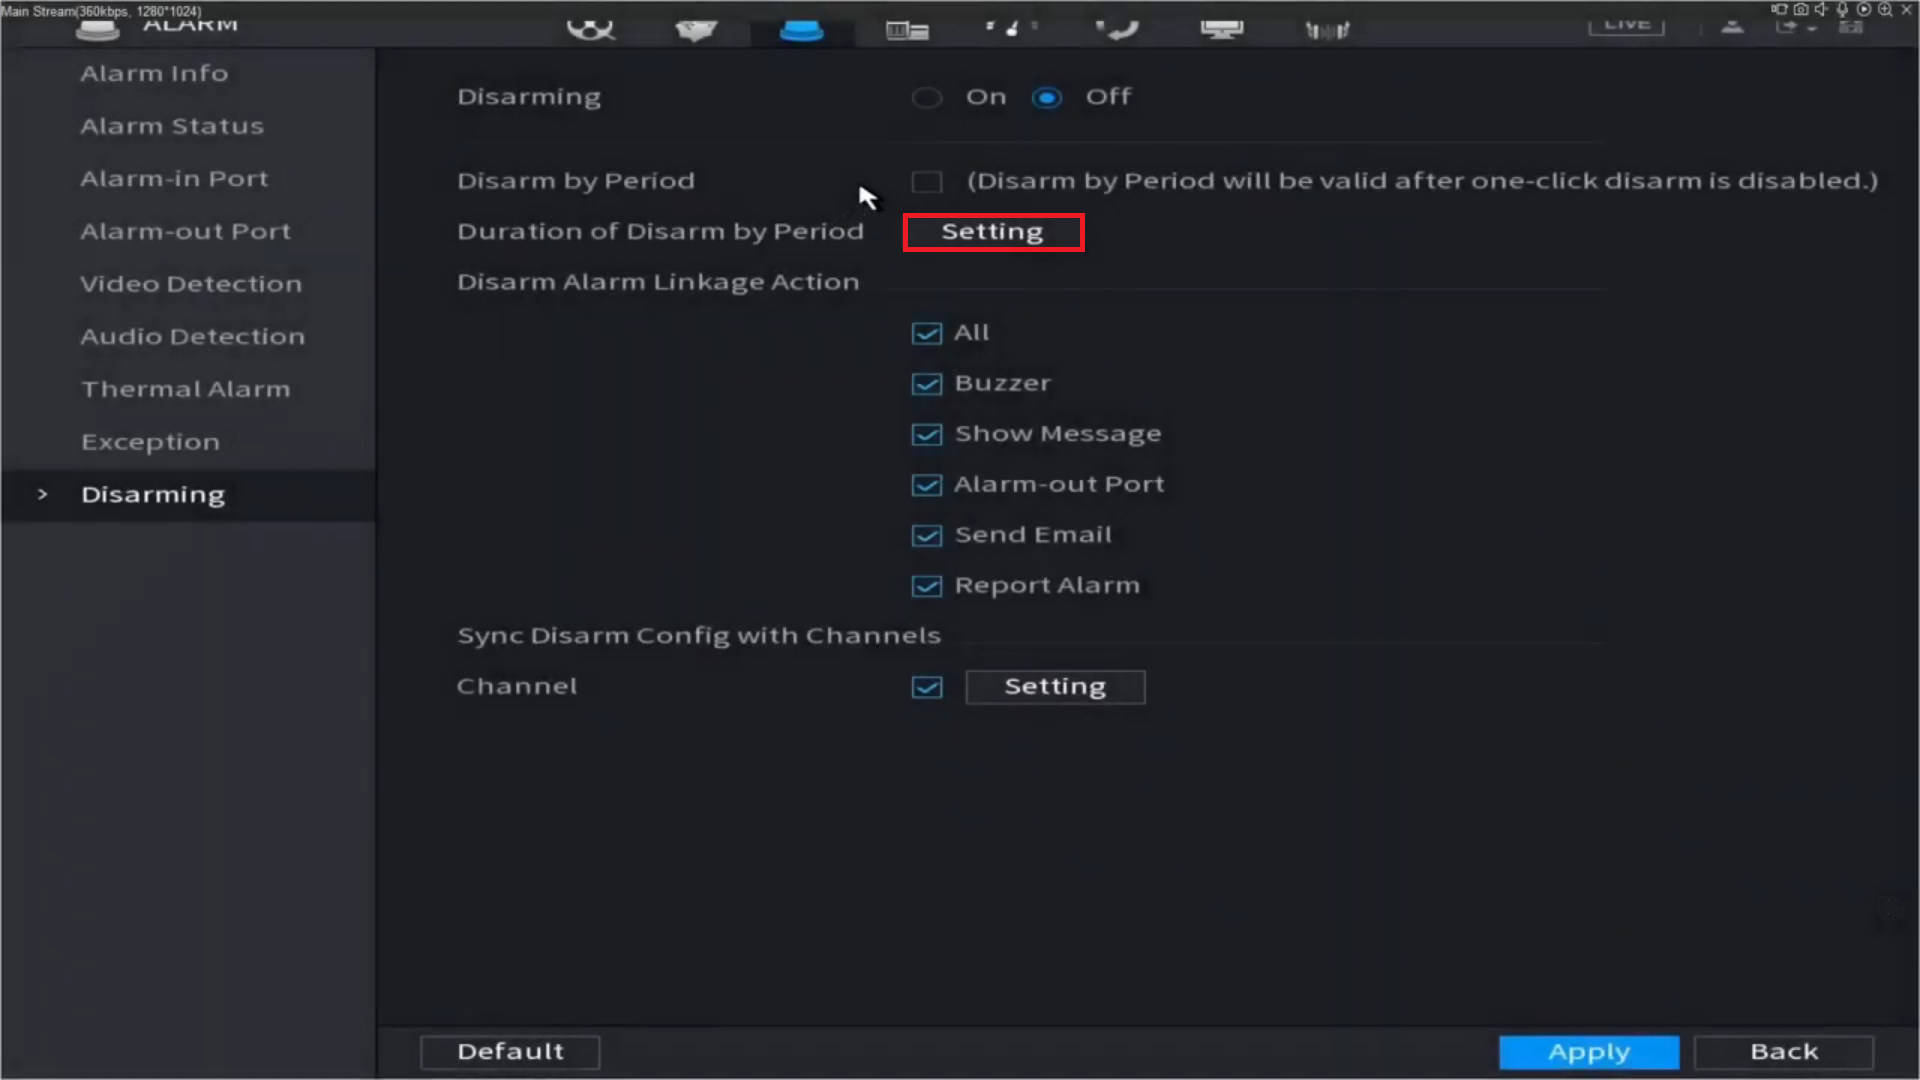
ARM/DISARM Warning Light and Alarm Sounds from NVR
- On the Live View page, locate the Bell
 icon next to the time in the top right corner. Click on it to activate or deactivate the deterrence features. A red indication signifies that it is armed, while grey indicates it is disarmed.
 - Alternatively, go to Main Menu > Alarm > Disarming. Toggle Disarming to On to deactivate deterrence features. Toggle Disarming to Off to re-enable them.
- You can set the Disarm By Period schedule if you wish to have this operation automated based on time.
- Do not forget to have the Channel Number your TiOC is on selected, within Sync Disarm Config with Channels.
ARM/DISARM Warning Light and Alarm Sounds from NVR Alarm Input
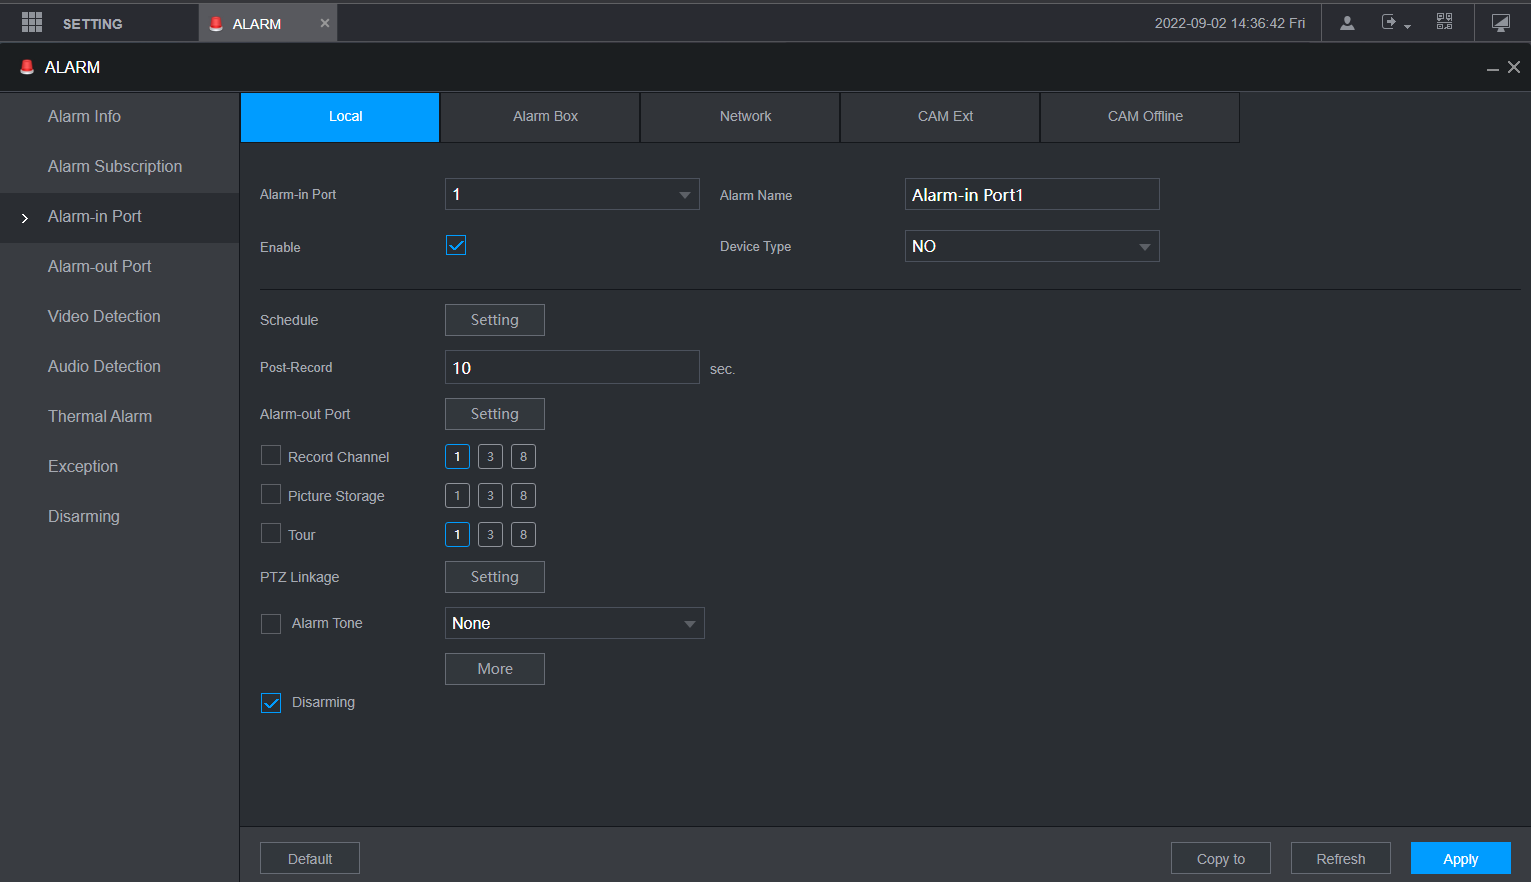
- Navigate to Main Menu on the NVR, then select Alarm > Alarm-in Port > Local.
- Choose the specific Alarm-in Port to which the device is connected.
- Check the Enable box.
- Check the Disarming box.
- Click Apply.
ARM/DISARM Warning Light and Alarm Sounds from NVR Disarming Period
- Go to Main Menu > Alarm > Disarming.
- Choose Setting.
- Fill out Period settings, then click OK.
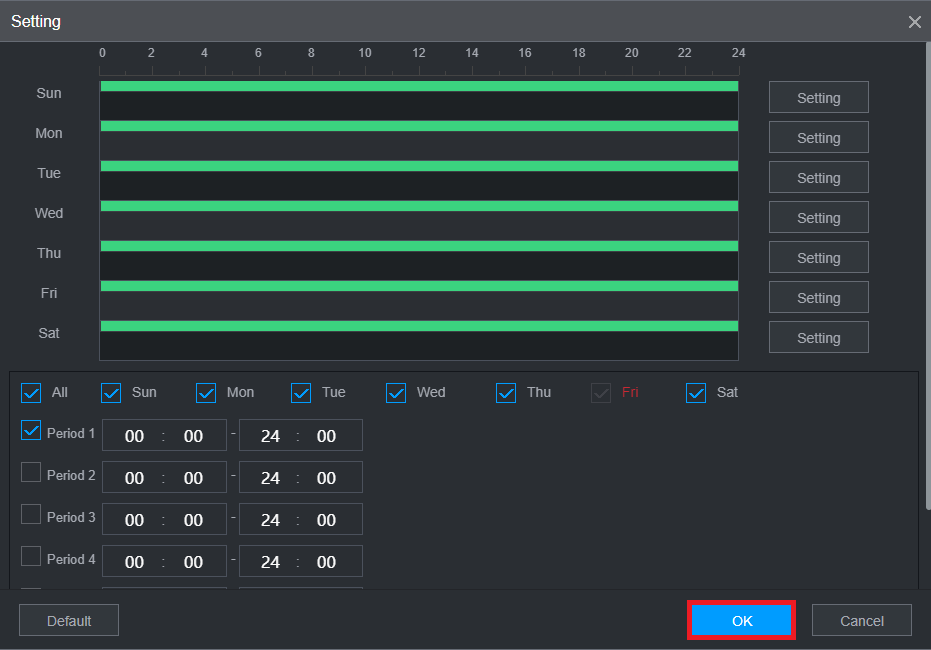
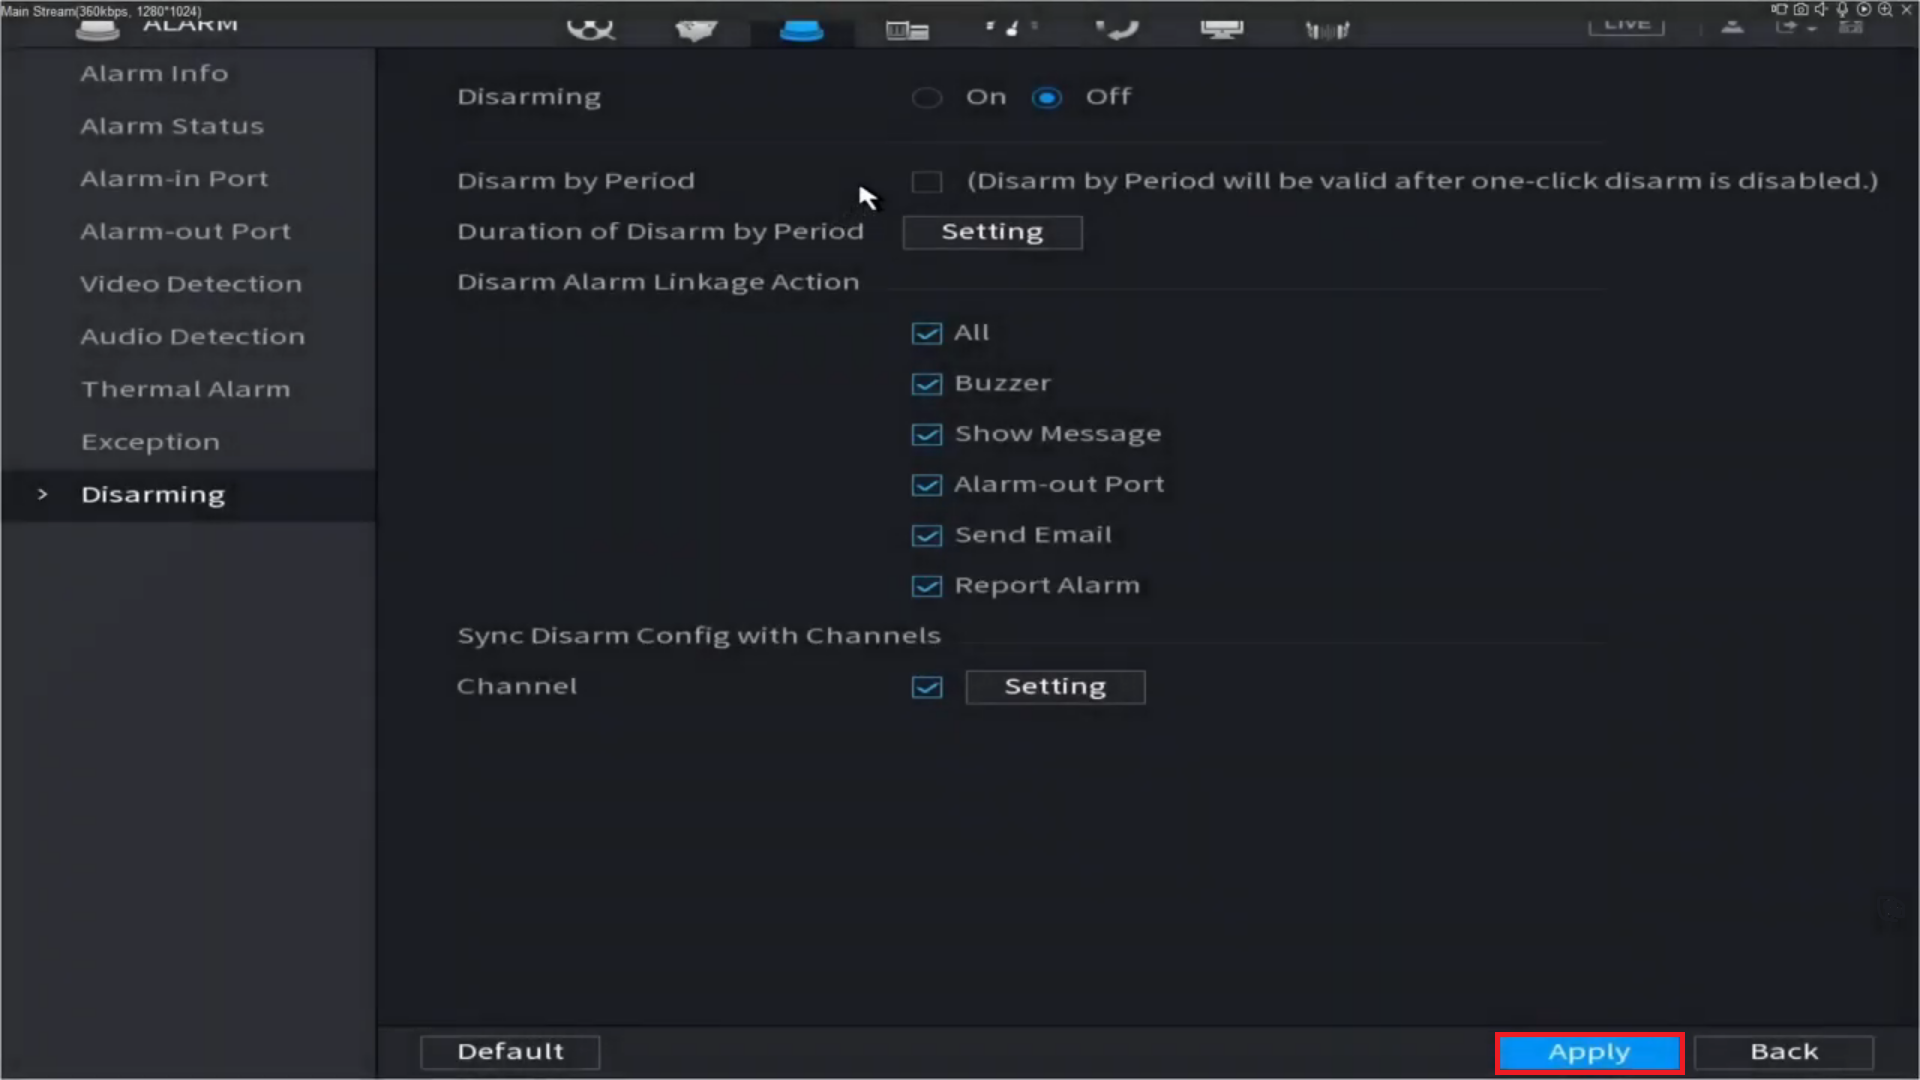
- Click Apply.
ARM/DISARM Warning Light and Alarm Sounds from TiOC Alarm Input GUI 5.0
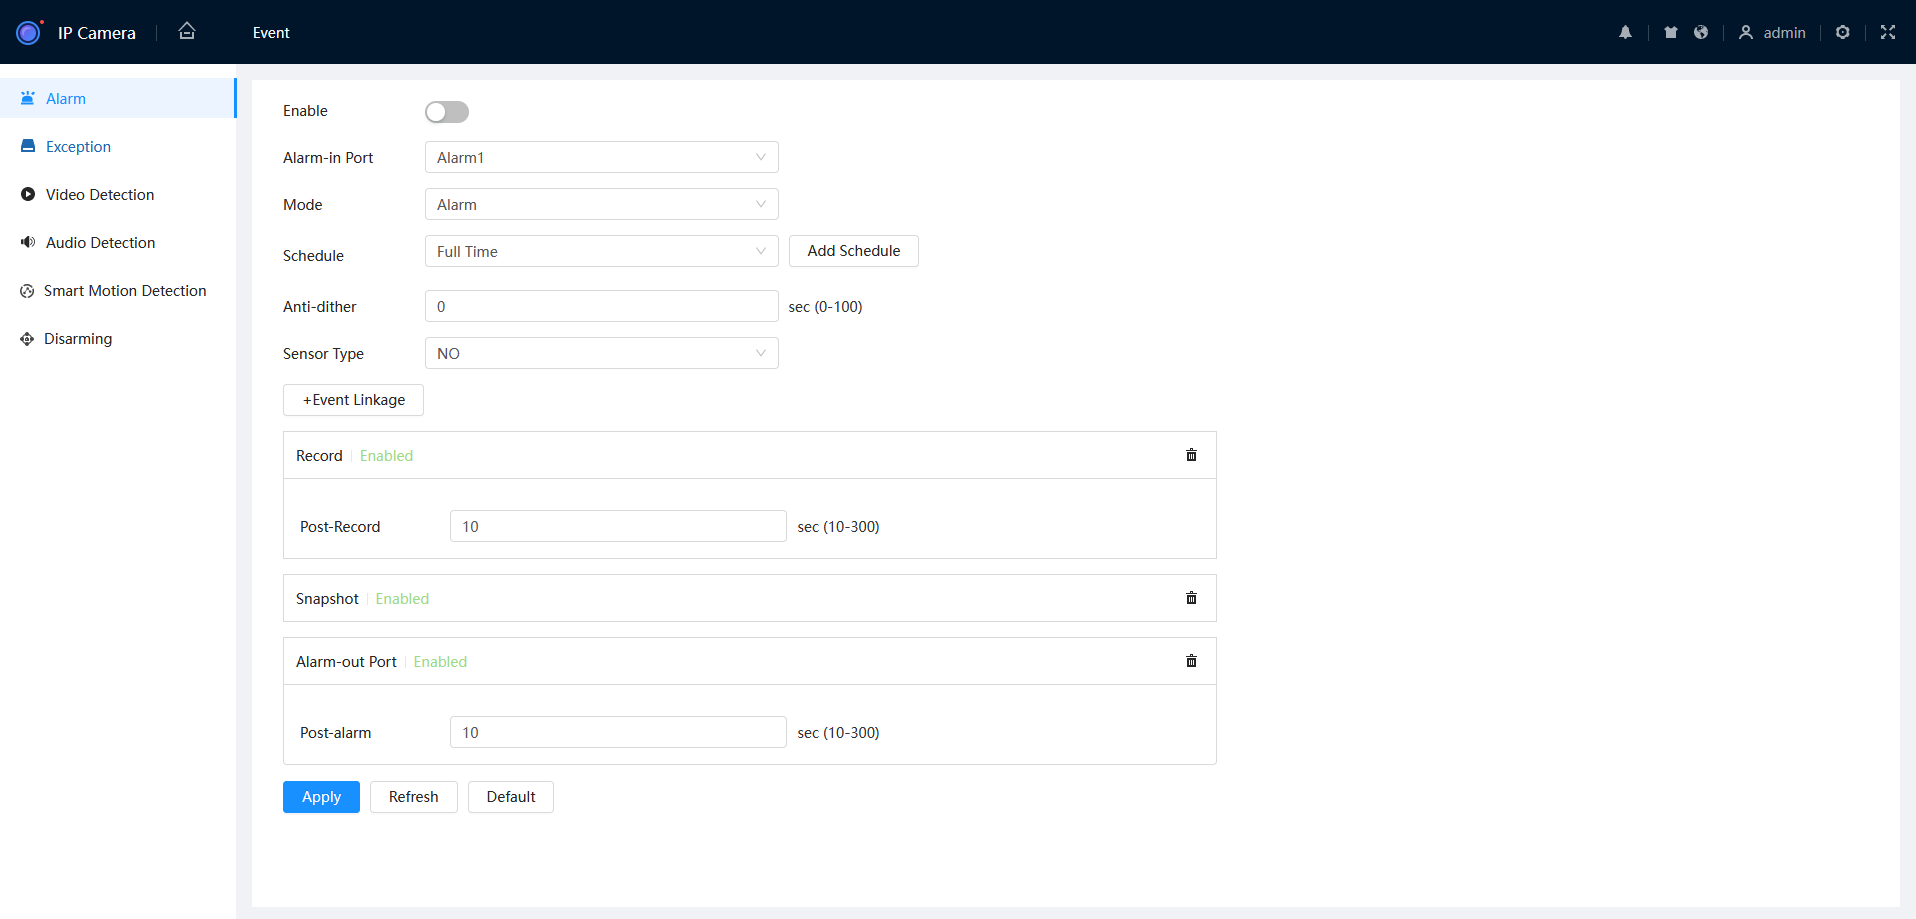
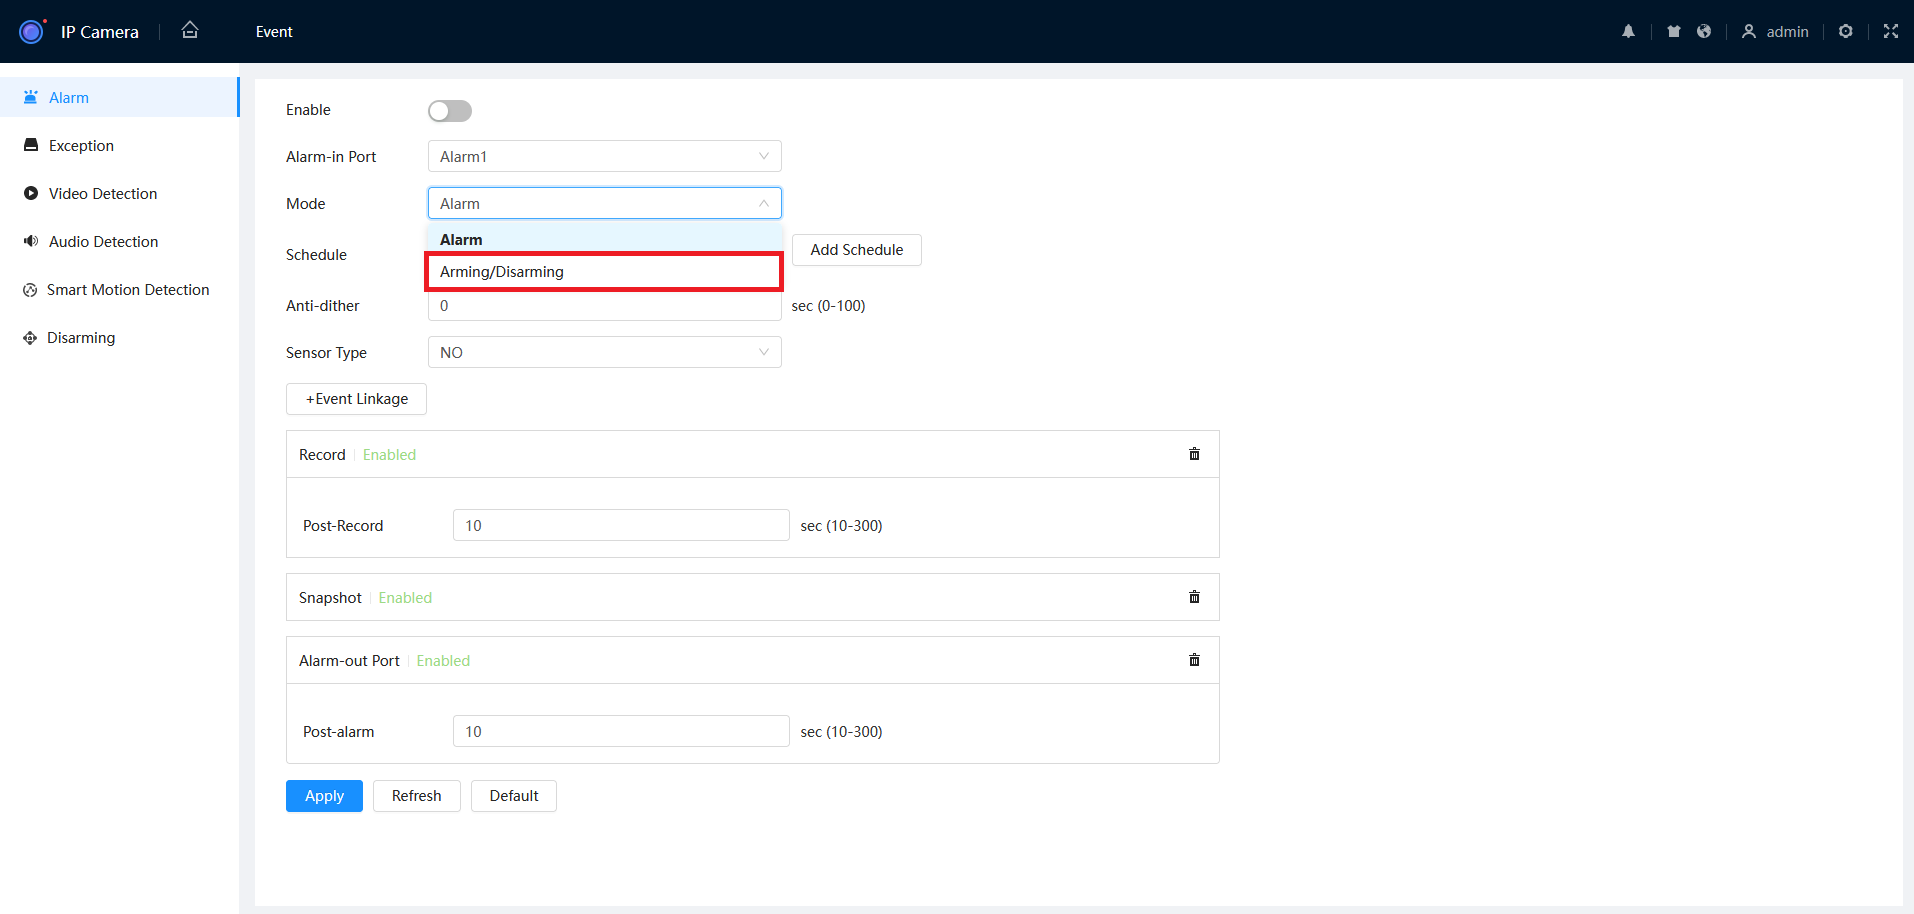
- From the main page, go to Event > Alarm.
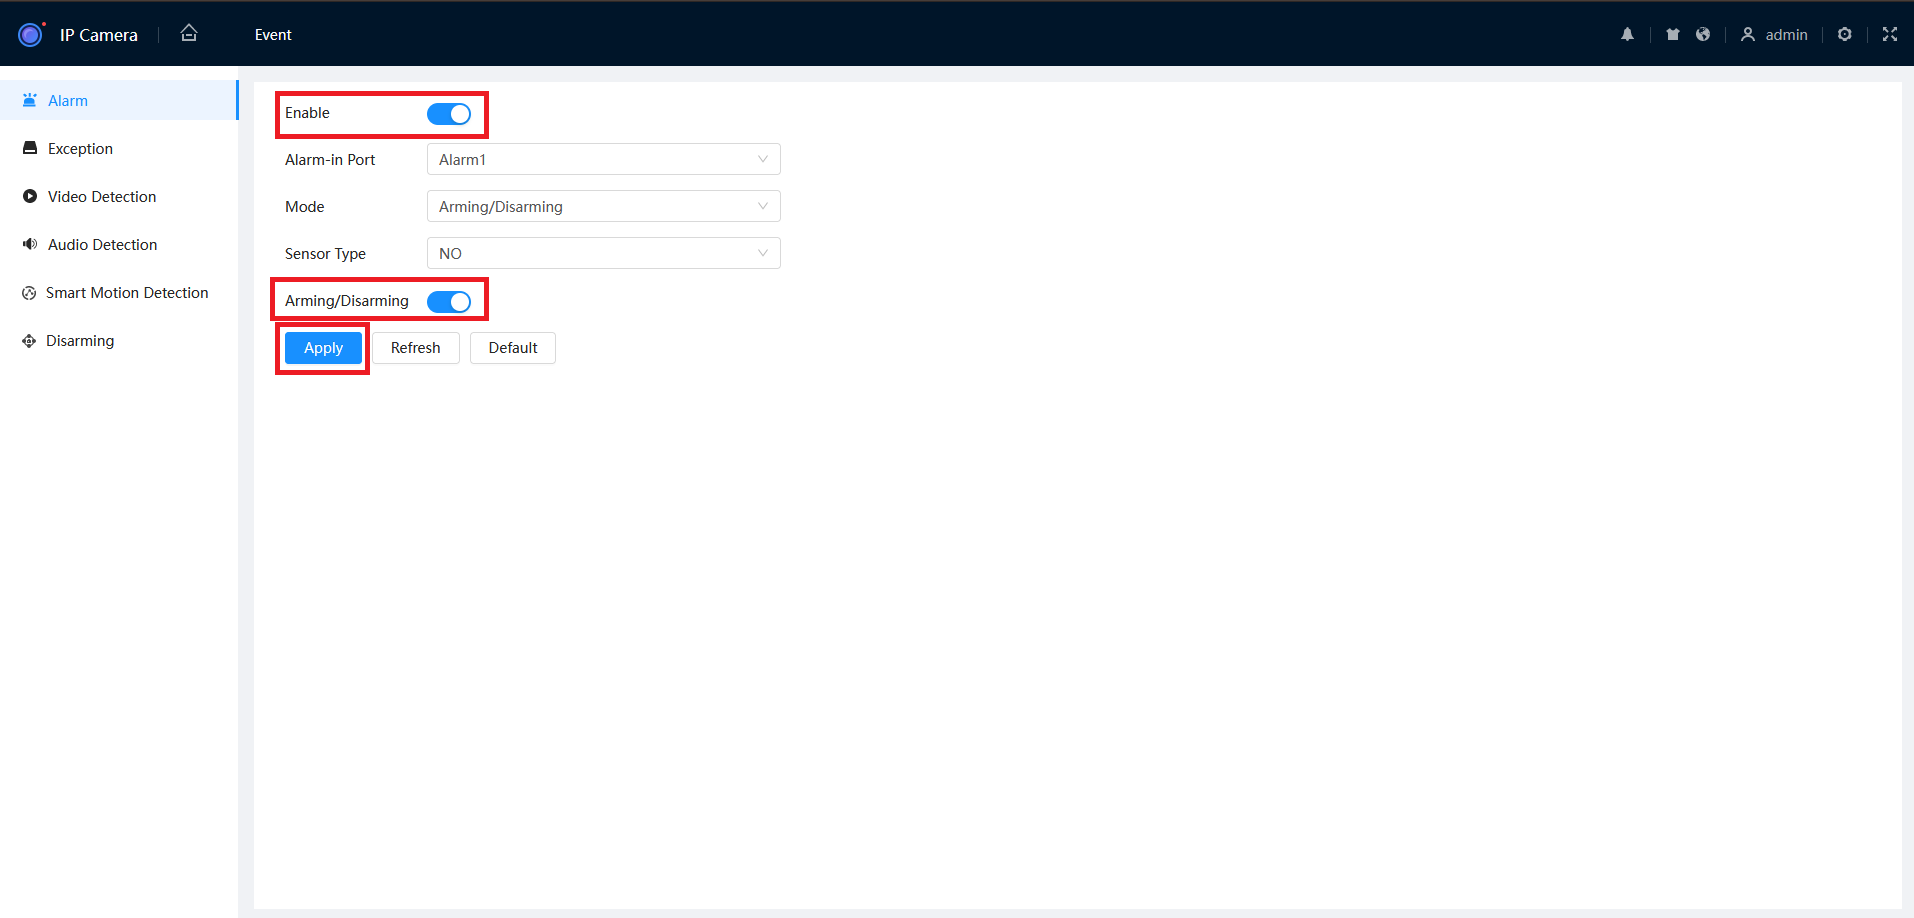
- Switch the mode to Arming/Disarming.
- Enable the status and set Arming/Disarming to On, then click on Apply.
ARM/DISARM Warning Light and Alarm Sounds from TiOC Alarm Input GUI 5.0
- From the home page, navigate to Event > Disarming.
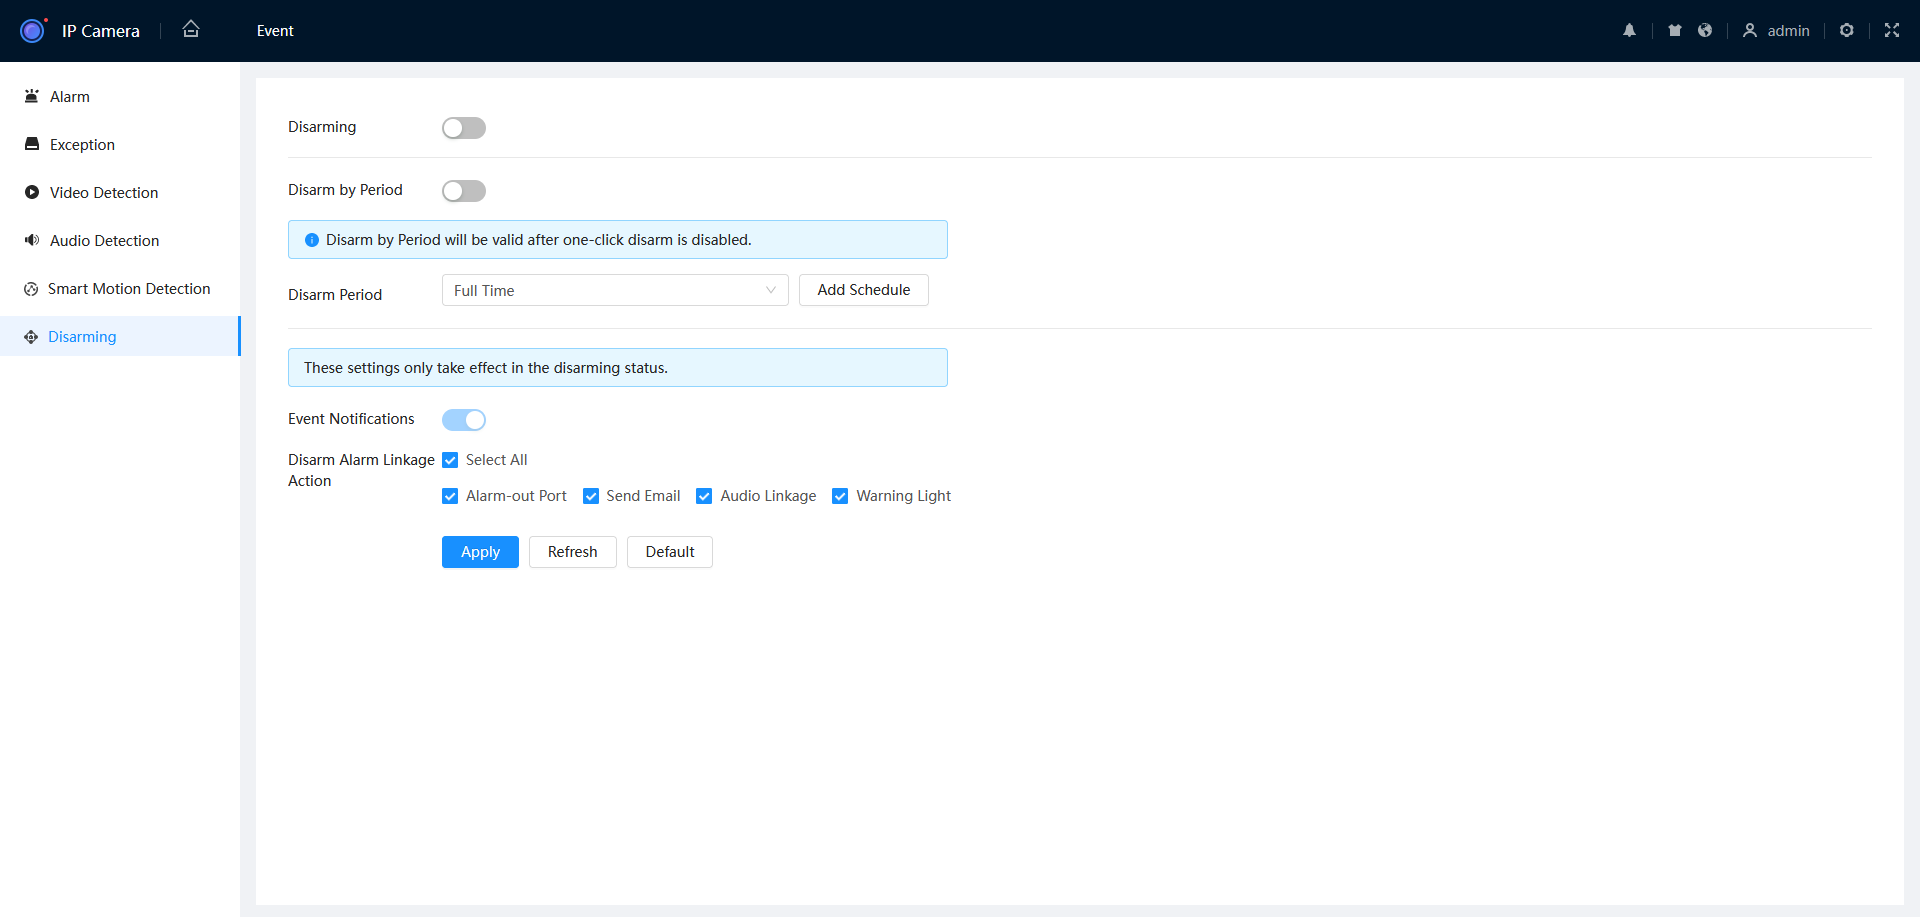
- Enable Disarm by Period
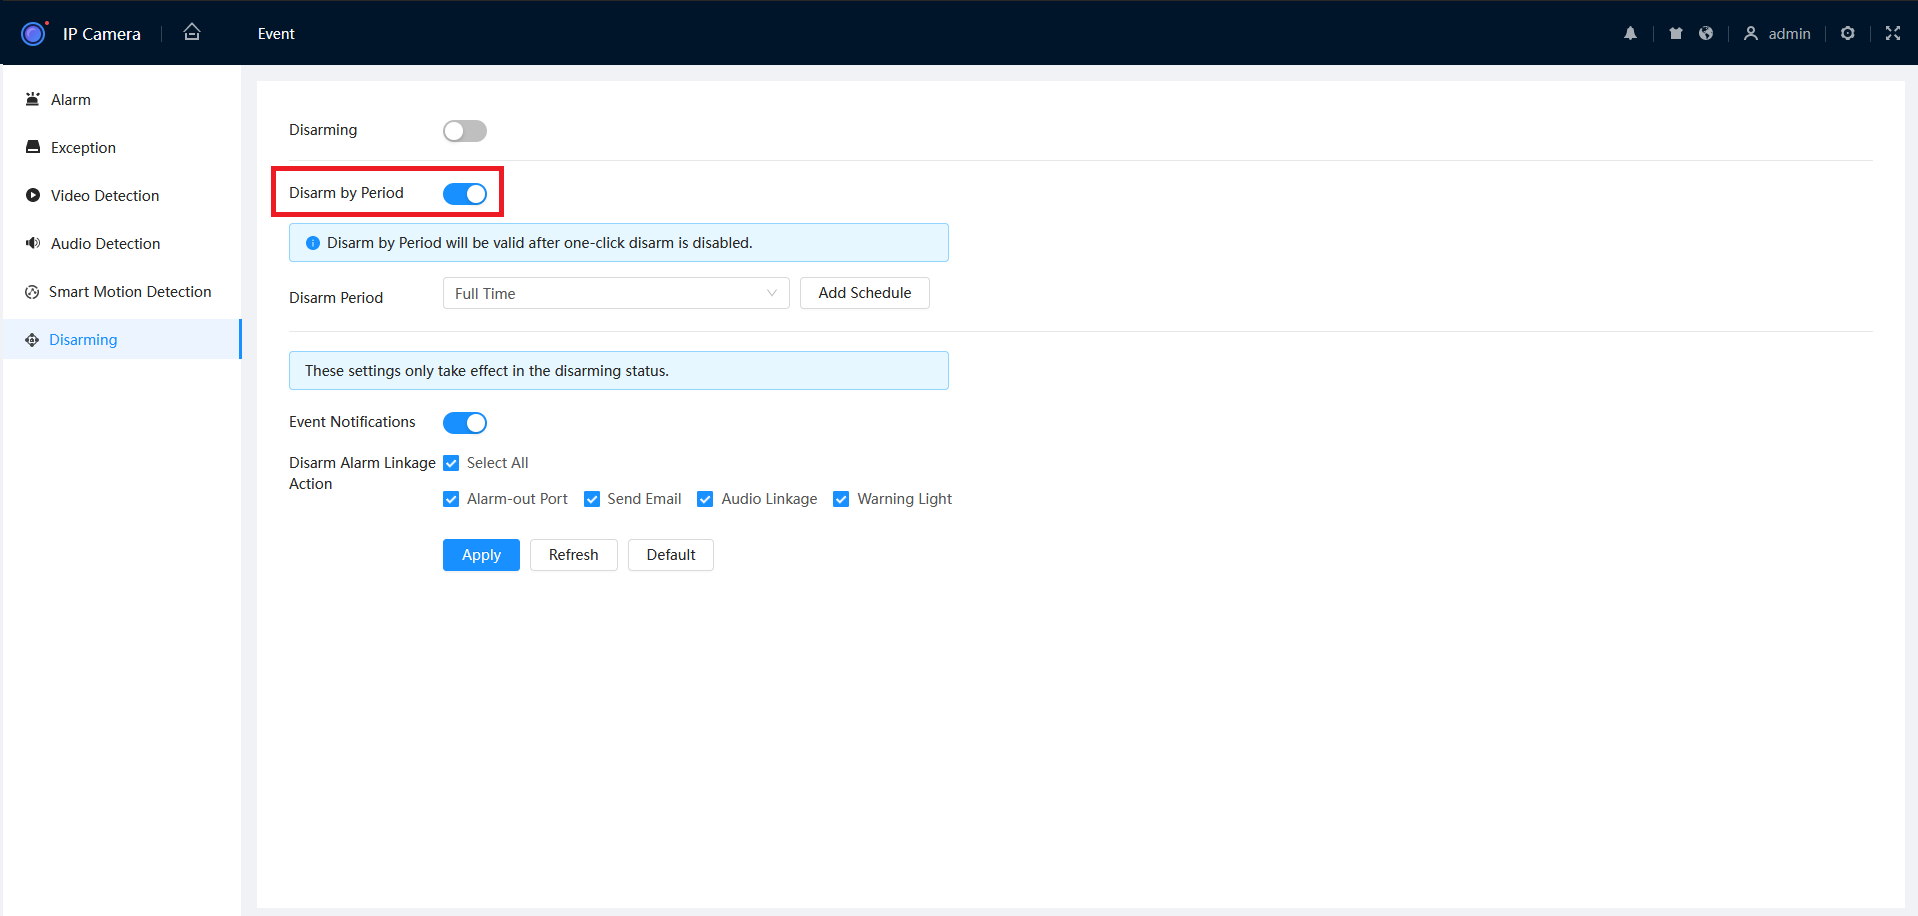
- Select Add Schedule.
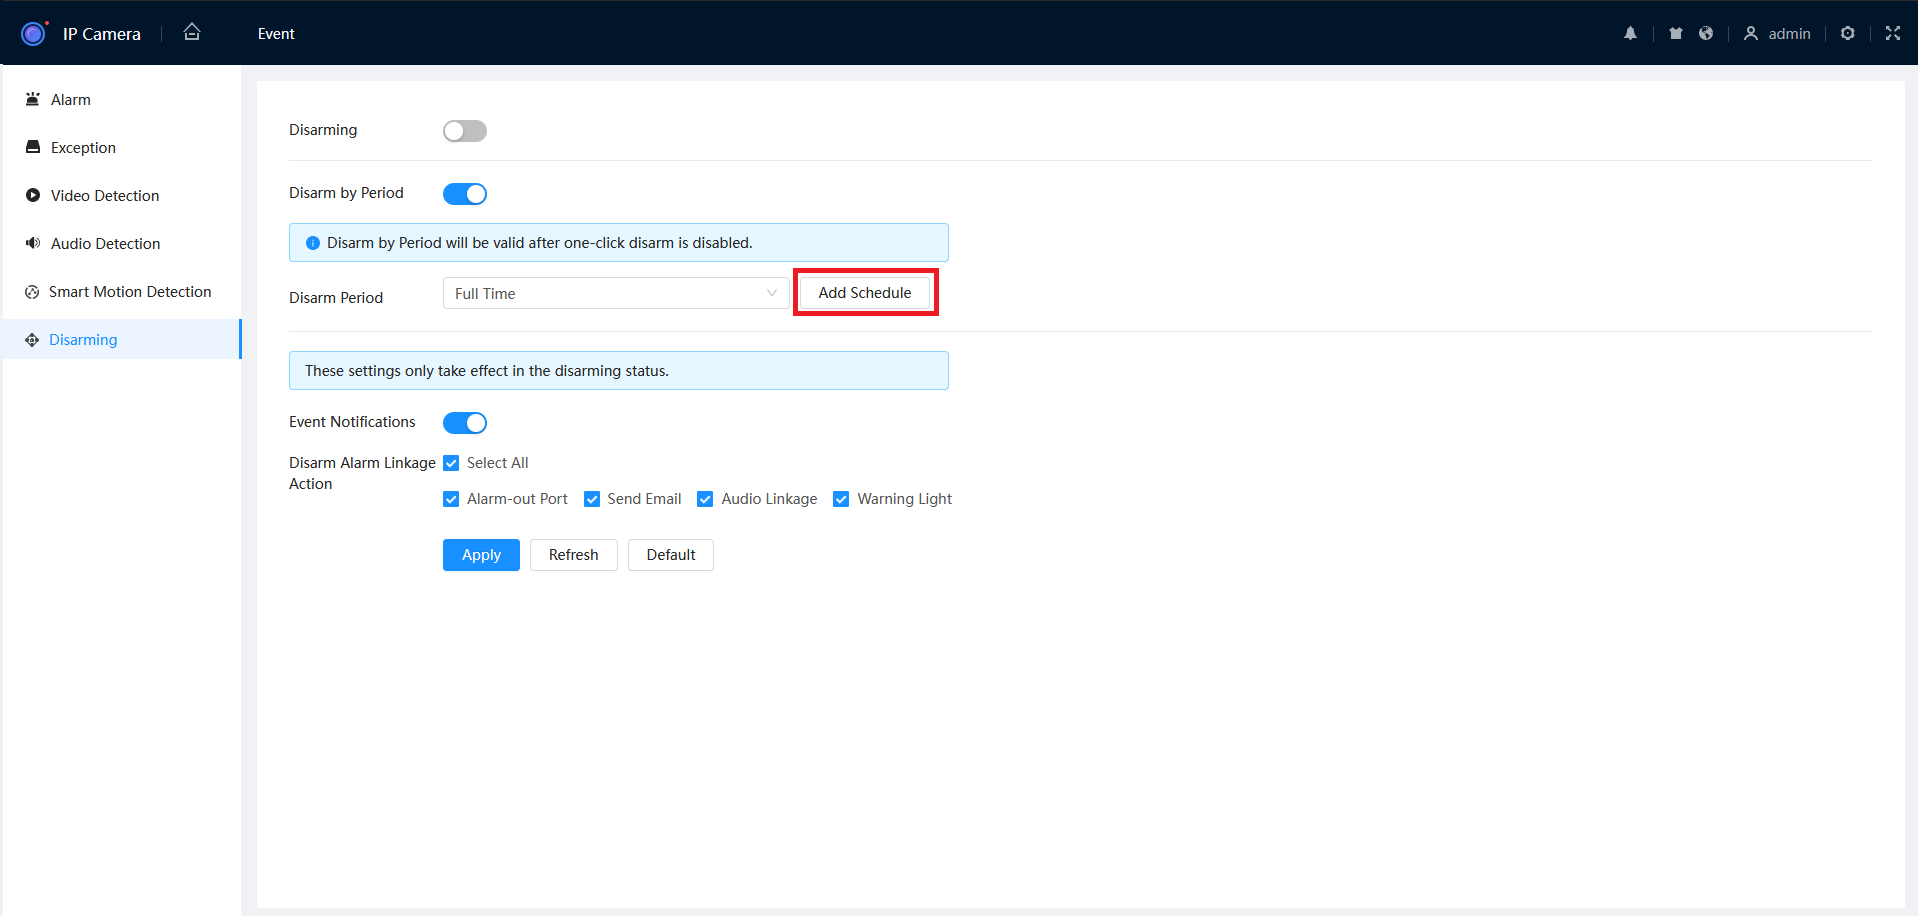
- Fill out the required settings, then press Apply.

Illuminator Options
The S3 and S4 generation of TiOC cameras have three options for night-time illumination.
IR Mode:
- Utilizes infrared light with a black & white camera image.
Warm Light Mode:
- Employs a white LED spotlight to illuminate the area, enabling 24/7 color vision.
- Adjusts the brightness of the white LED based on the ambient light in the area.
Smart Illumination:
- Integrates features from both IR and Warm Light modes.
- Initially operates in black & white infrared mode.
- Upon detecting a target via SMD or IVS rule, switches to 24/7 color mode.
- Activates the white LED spotlight if ambient light is insufficient, ensuring optimal video quality for capturing the target.
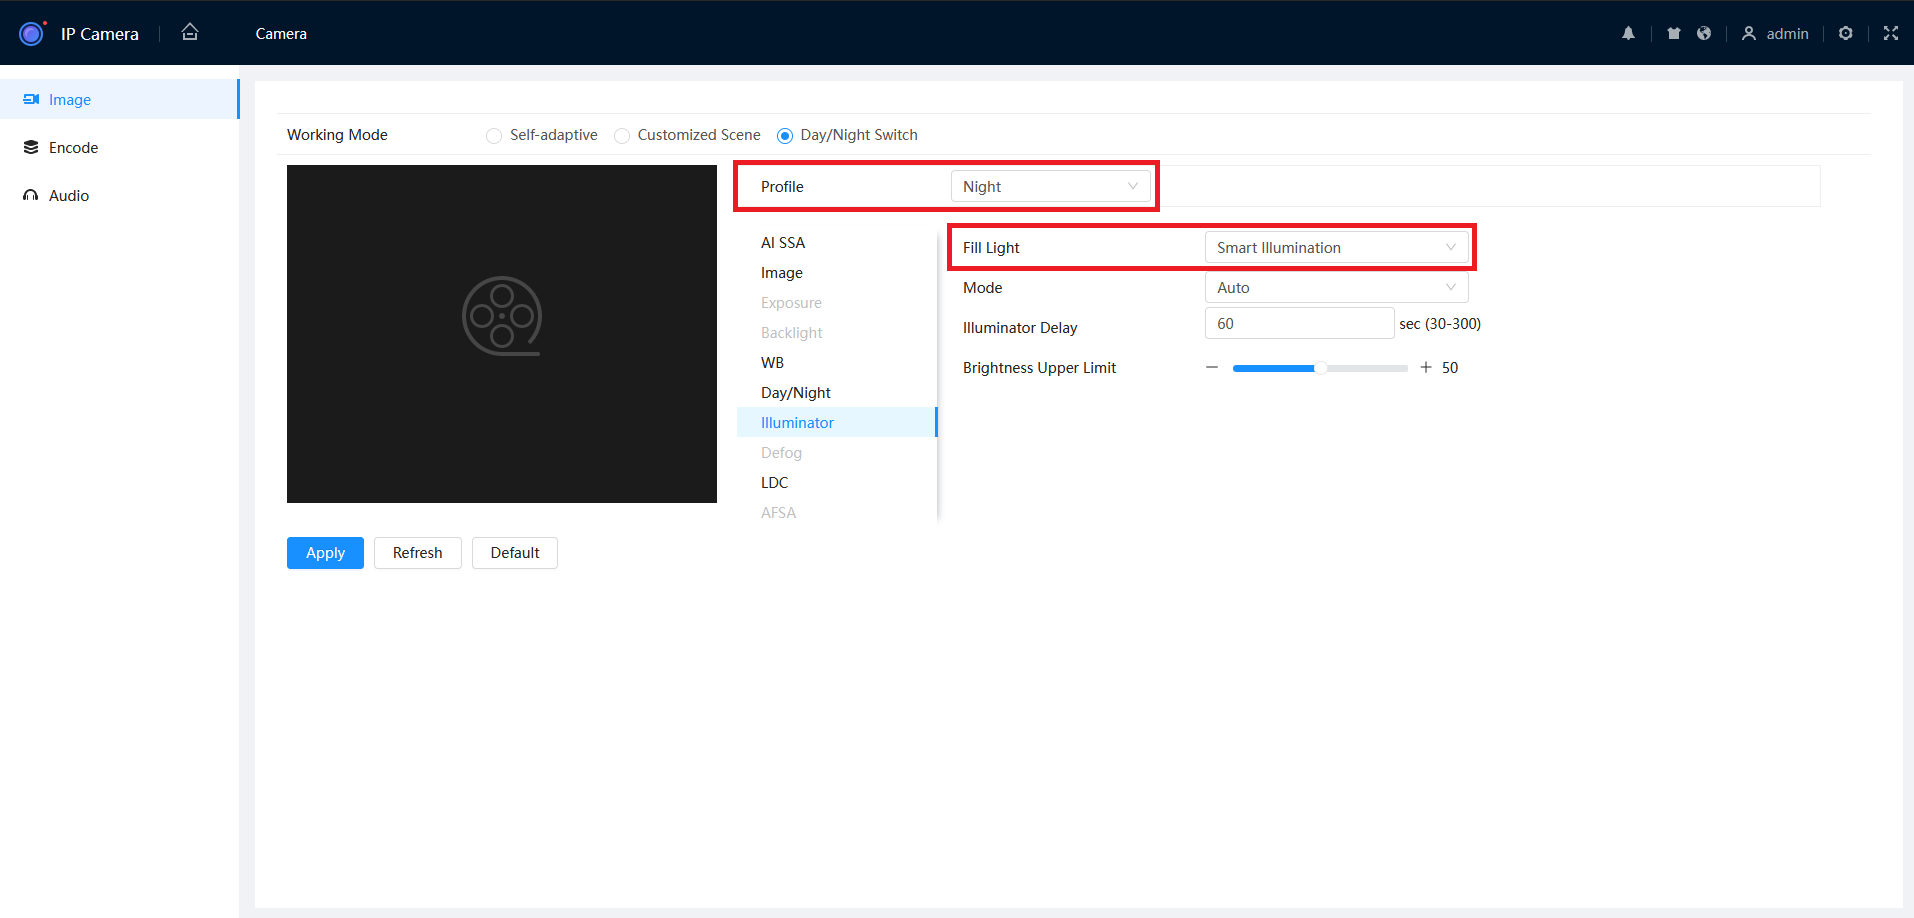
How to Change the Illuminator mode options in the TiOC Web GUI V5
- From the home page, navigate to Camera > Image.
- Set the Working Mode to Day/Night Switch, then choose Illuminator.
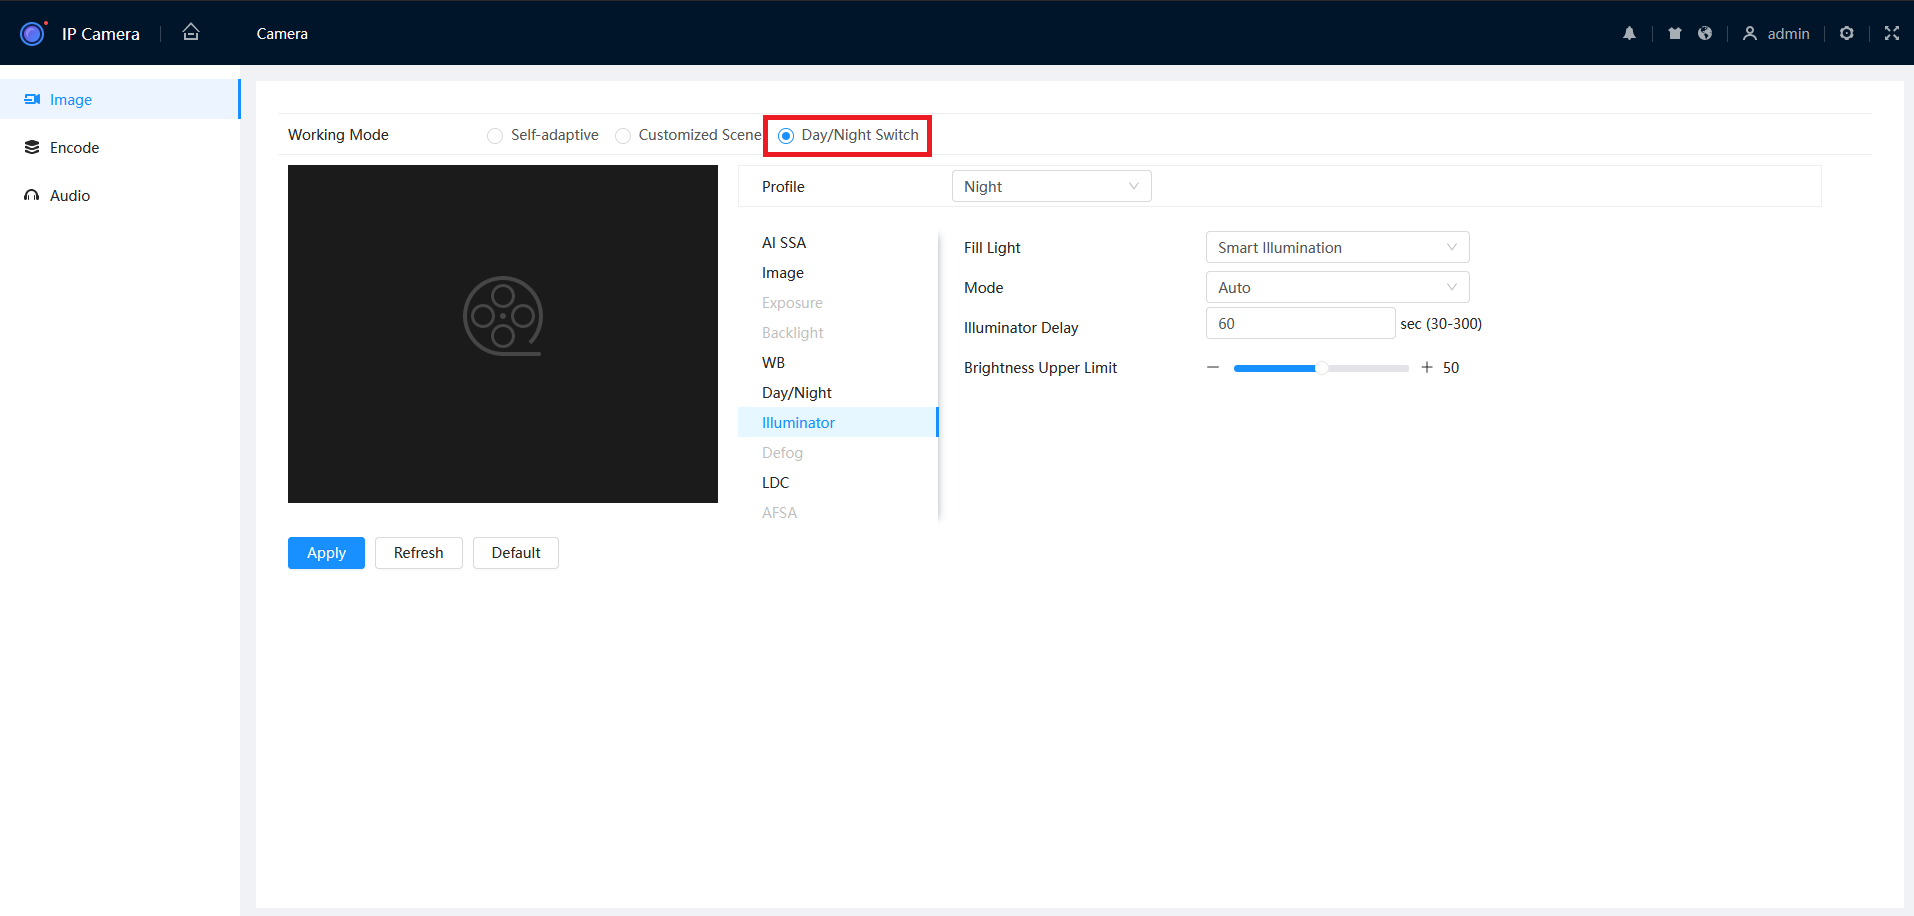
- Set the Profile to Night, then set the Fill Light to the desired setting.
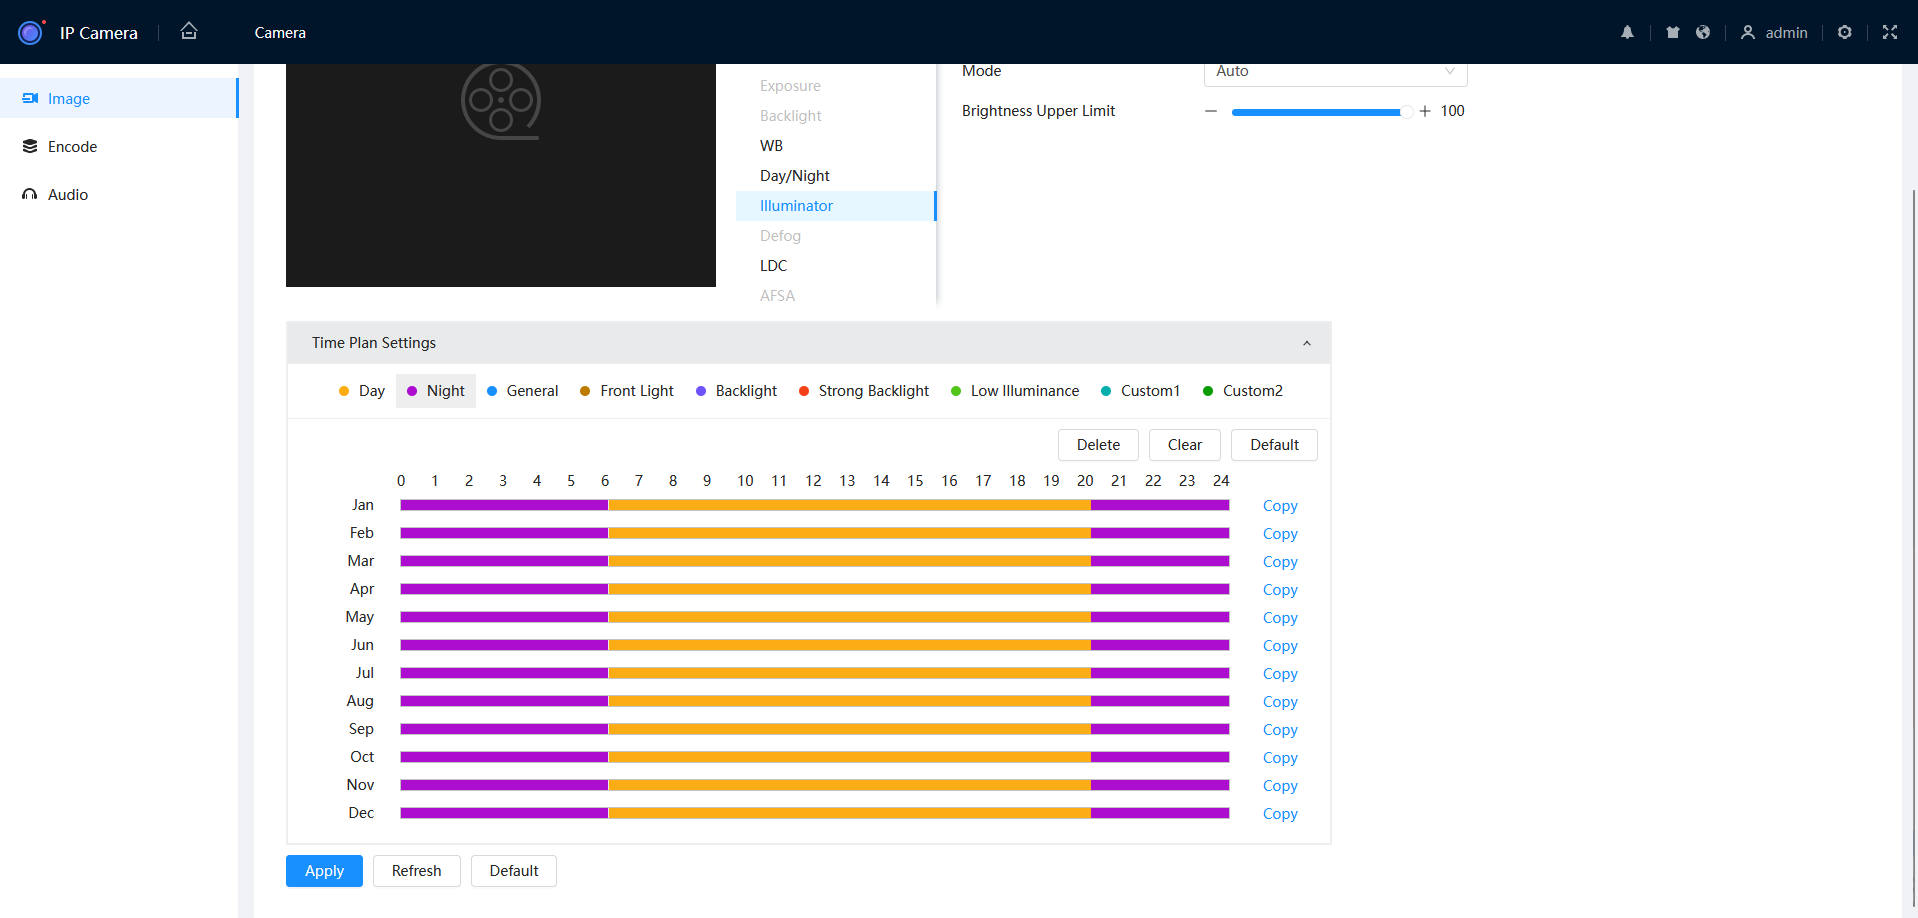
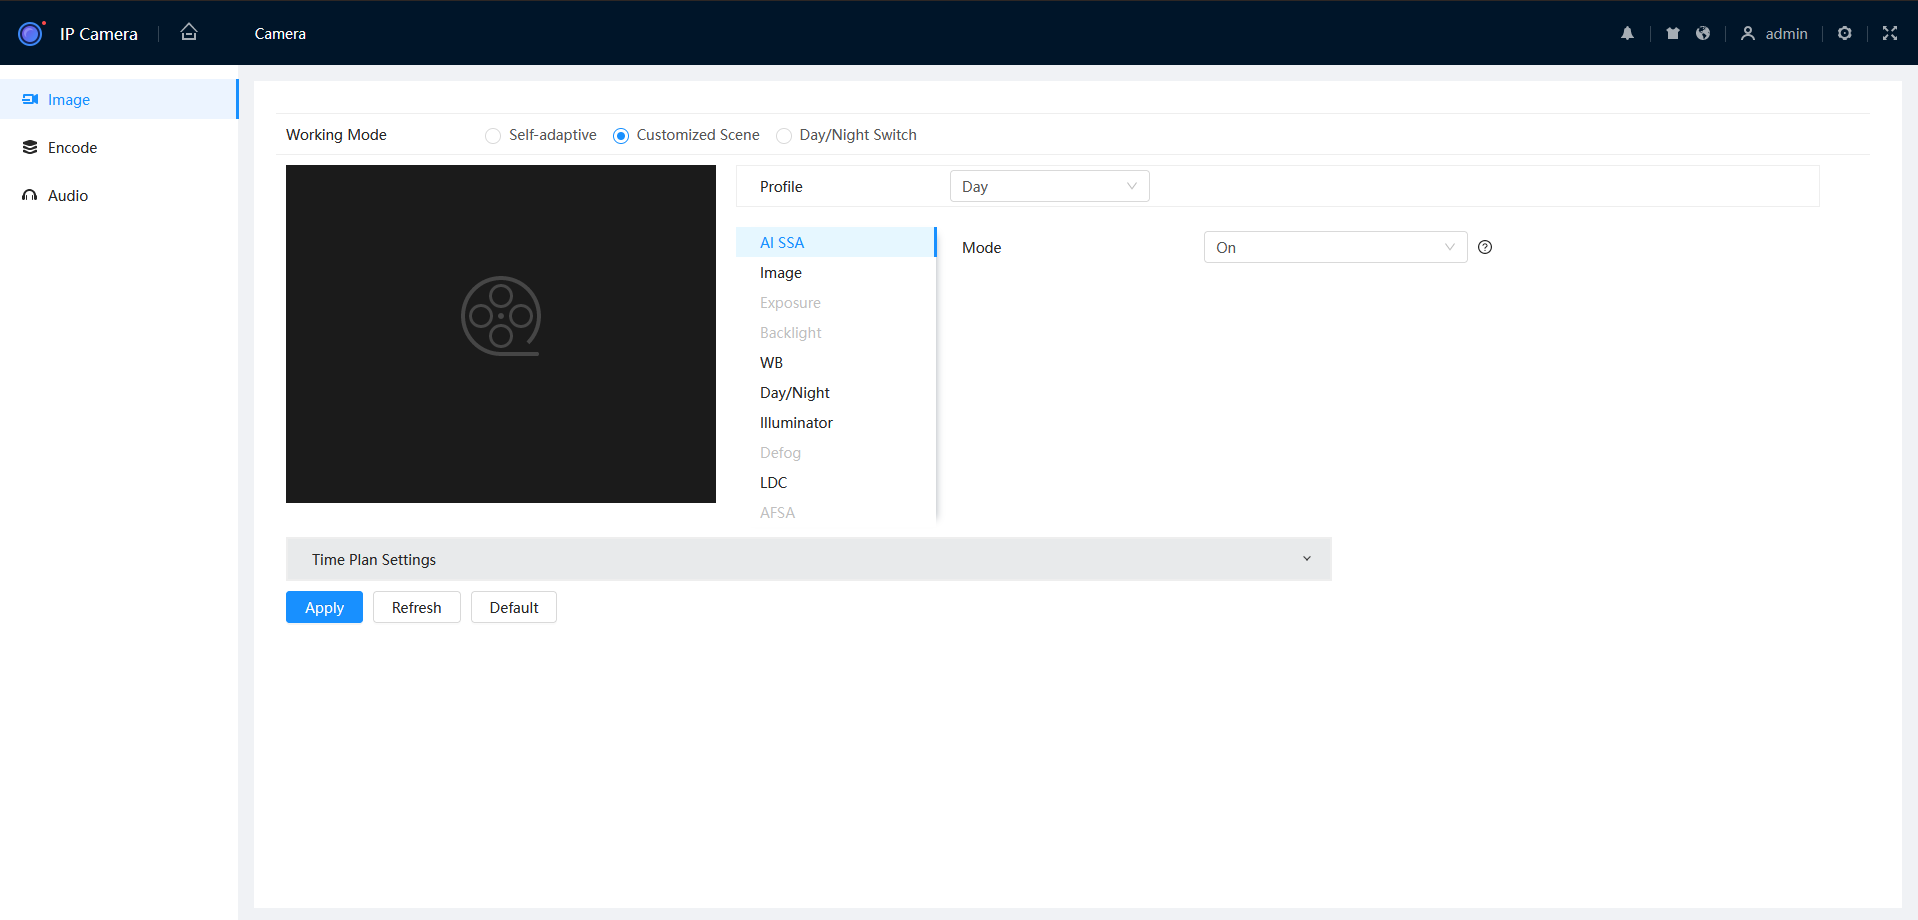
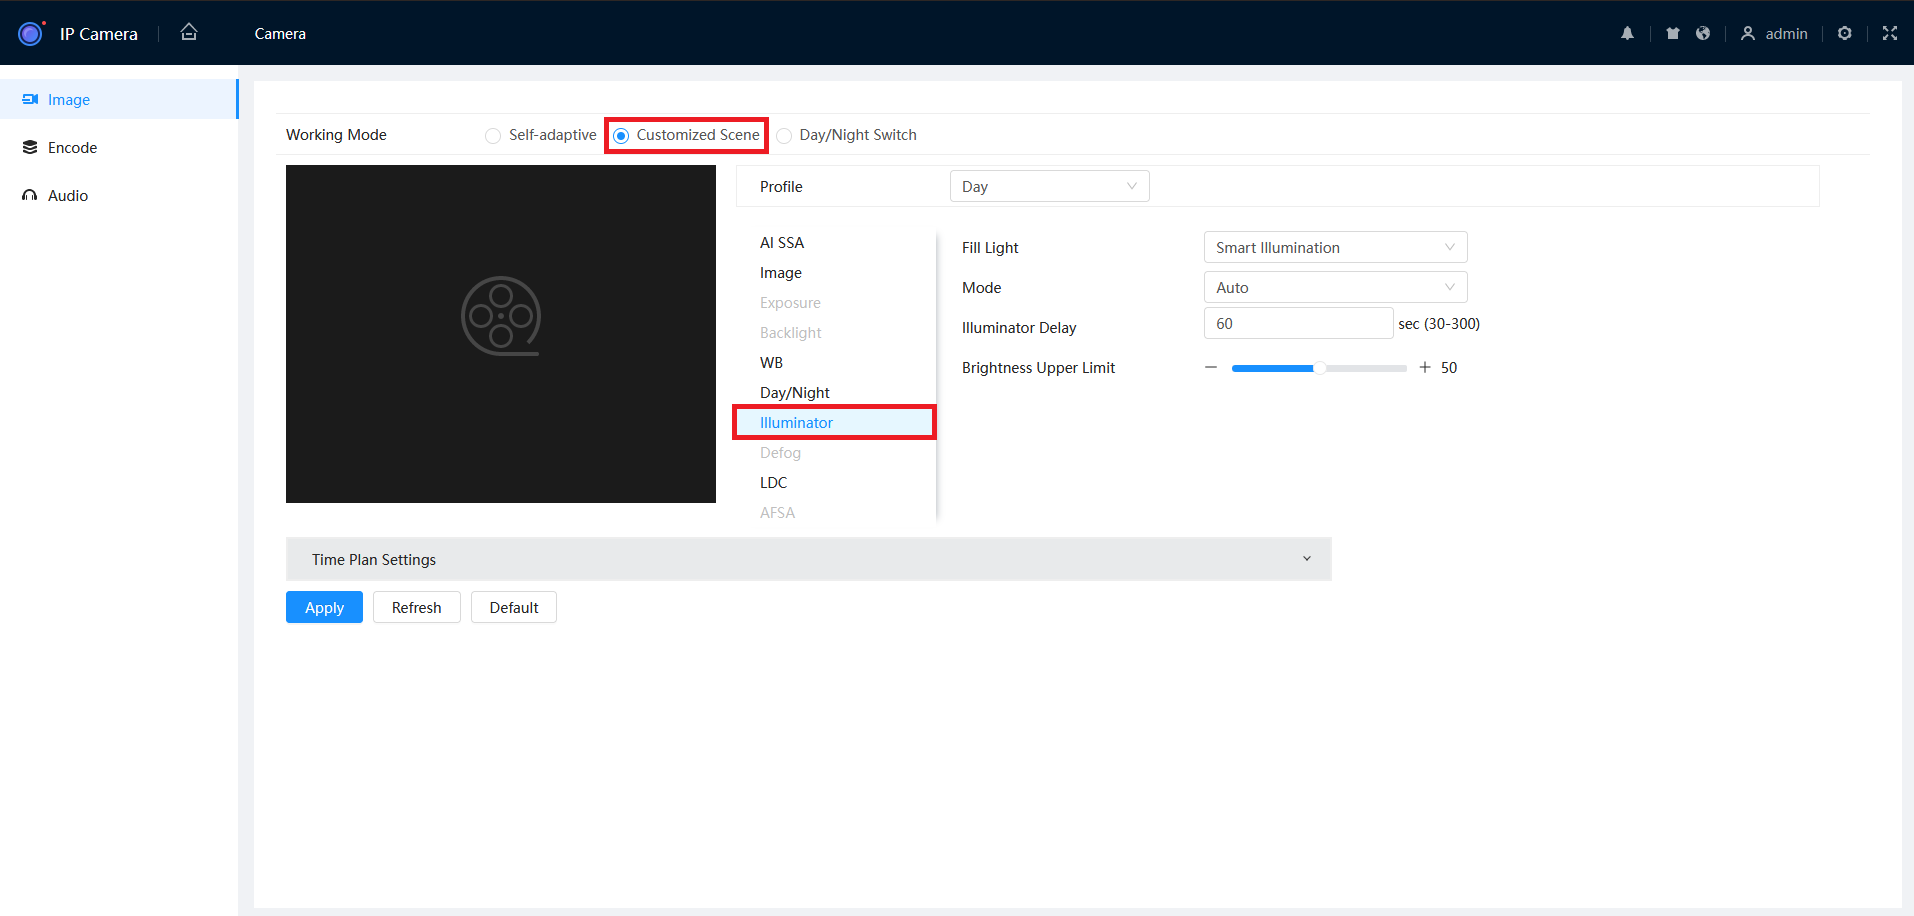
How to Schedule the Warm Light in the TiOC Web Interface V5
- From the home page, navigate to Camera > Image.

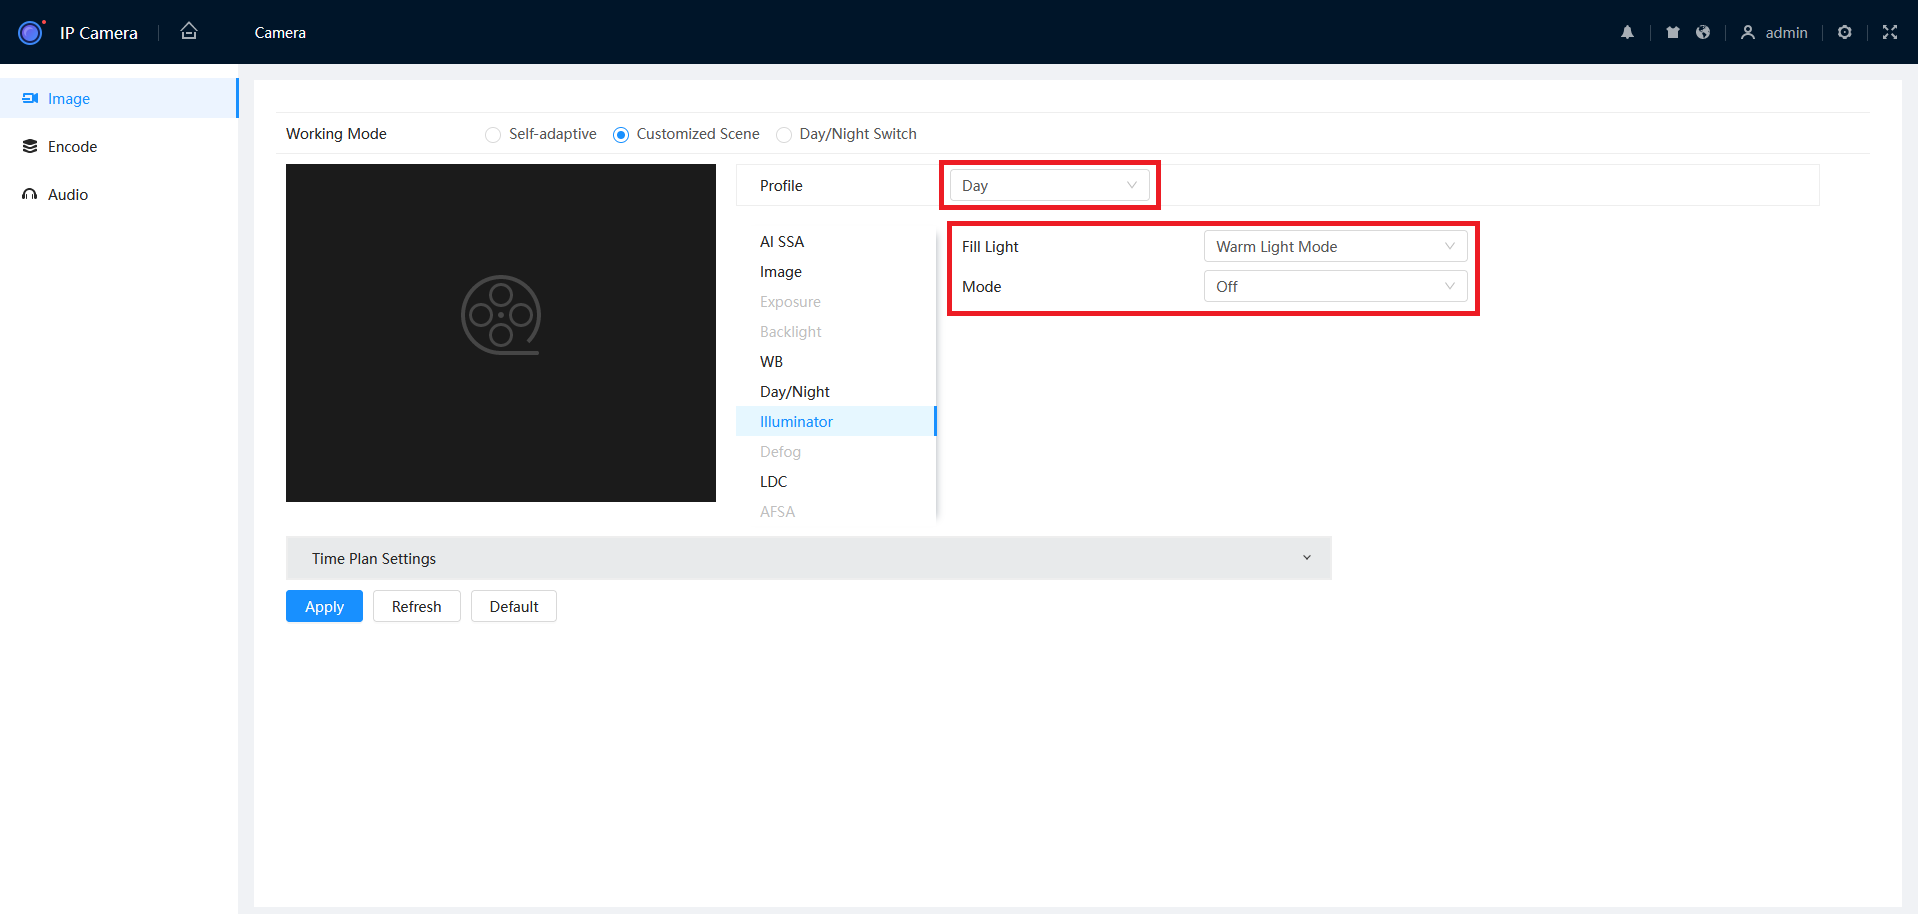
- Set the Working Mode to Customized Scene, then select Illuminator
- Under the Day Profile, set the Fill Light to Warm Light Mode and set the Mode to Off.
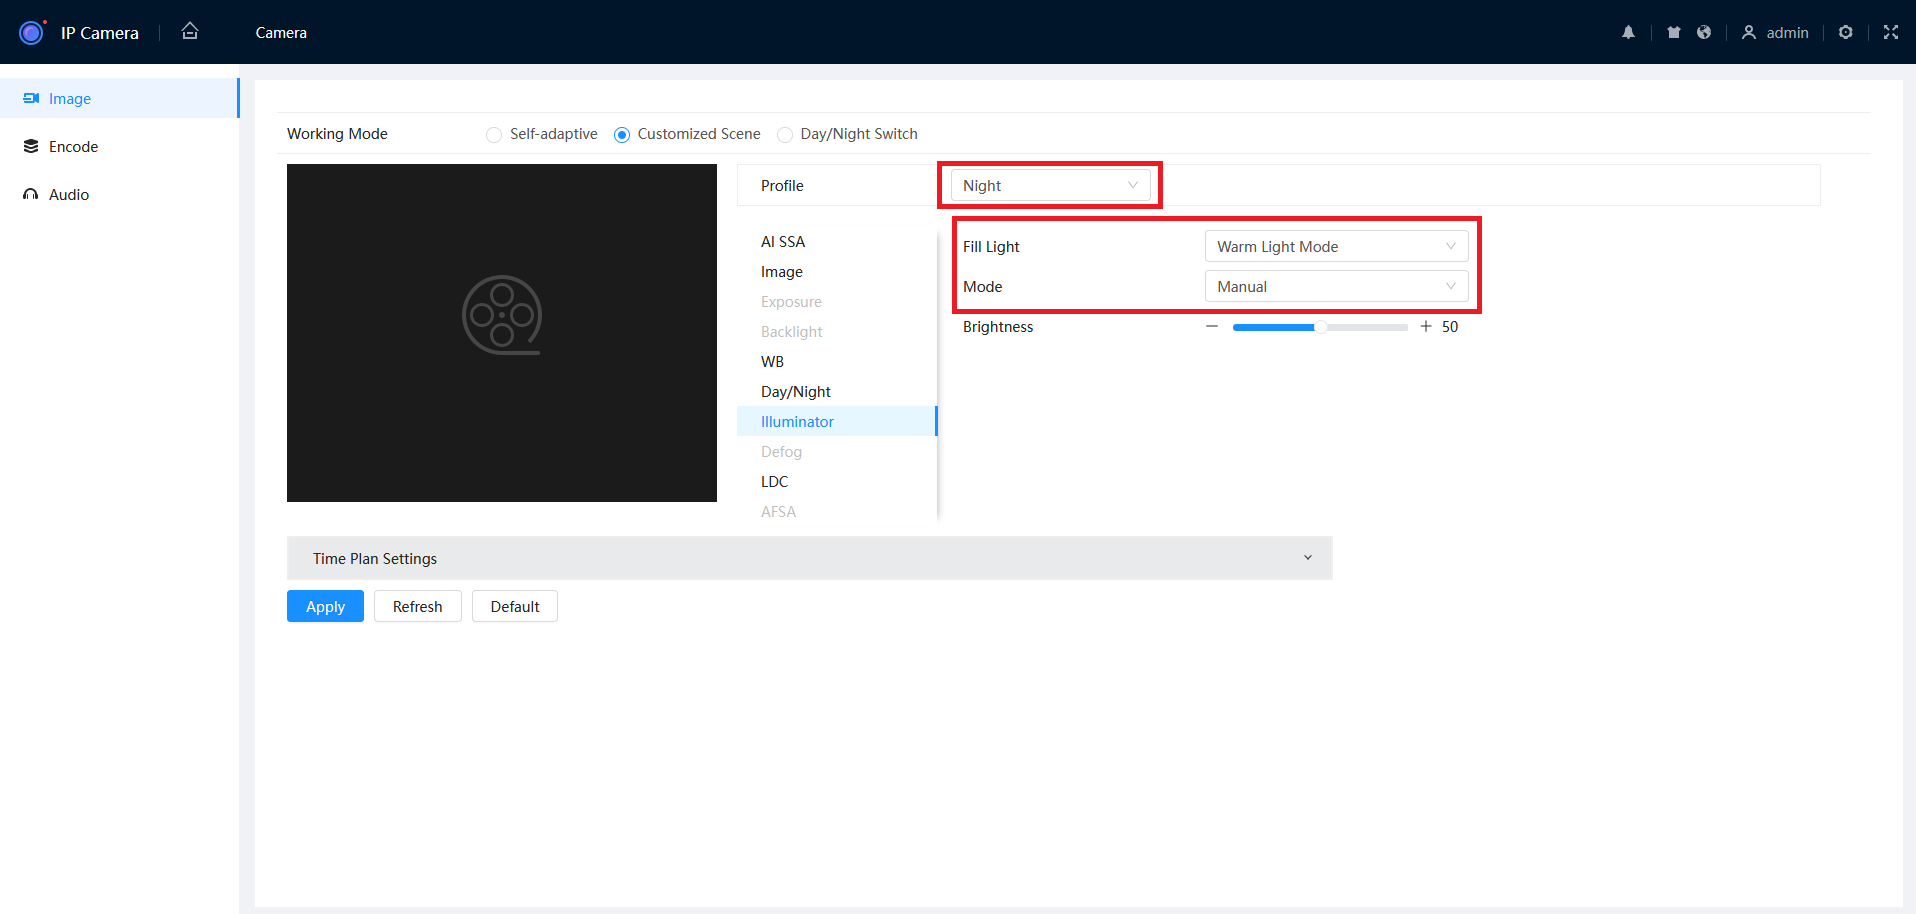
- Under the Night Profile, set the Fill Light to Warm Light Mode and set the Mode to Manual.
- Select Time Plan Settings, then adjust the graph to the desired times.