P2P cloud technology has made a big impact on how our customers set up remote access to their installations over the last few years. The following article will explain what you need to do if you have any existing customers using the ICRDNS.COM domain to access their security cameras.
We all know that setting up port forwarding, DDNS and IP address mapping can be a timely process and even confusing at times. With the ever-increasing concerns with cybersecurity, P2P has given us all the advantage of making remote connectivity to our products, a much simpler and more secure process than it has been in the past.
Many of our older customers may still have a number of sites using ICRDNS.COM as the DDNS updating the dynamic IP changes of their customers' broadband router. Many of the addresses on this domain could be up to several plus years old, and from what we can see is that the majority are no longer in use.
- PLEASE NOTE THAT ICDDNS.COM HOSTNAMES ARE NOT RELATED TO THE ICRDNS.COM SERVICE AND WILL NOT BE AFFECTED BY THESE CHANGES
WHAT DO I NEED TO DO?
As of 3rd of April 2020, ICRDNS.COM hostnames will begin to be shut off in small batches over a period of the next few weeks in order to minimize the fallout of shutting down the domain for installers who have customers who happen to be still using the service.
If you happen to keep a record of customers' DDNS name, it would be advised to inform them that they may experience an interruption to their remote access and that both their recorder and mobile applications, will need to be reconfigured in order to re-obtain access to their cameras
The most advisable solution would for customers to upgrade to an updated product that has P2P functionality or if this is not possible, set up a 3rd party DDNS service. Some older models can be updated to add P2P but this is a limited number. Contact our tech support team to find out if your recorder can be updated for P2P. IC Plus Technical Support Email: help@ic.plus
FIRMWARE UPGRADE
Depending on the model of the recorder, there may be an available firmware update that will add P2P as a function. Firmware upgrades for IC Realtime products can be found on our website or at the below link.
3RD PARTY DDNS SERVICE
Setting up another DDNS on the recorder is a cost-effective solution if a product upgrade is not possible. There are many options out there, and we find that a simple one to use is NOIP DDNS.
CONFIGURING A NO-IP DDNS ON YOUR DVR/NVR
1. Go to NOIP.COM
2. Create a custom domain name and select host service. We are going to use our company name, IC Plus as the host name and “ddns.net” as the domain hosting service. Your host name needs to be unique, so you could use something like a business name or similar.

3. Click Sign Up and complete your email address, password and confirm DNS domain name details.
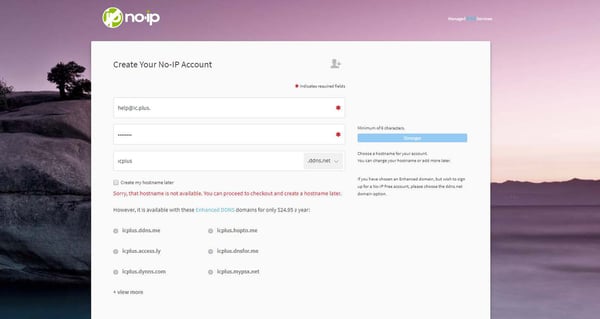
4. Select either “Get Enhanced” or “Free Sign Up”
If you select the “Free Sign Up” you may use NOIP’s DDNS service for free, but you must reply to an automated email every 30 days to confirm you wish to keep the domain name.
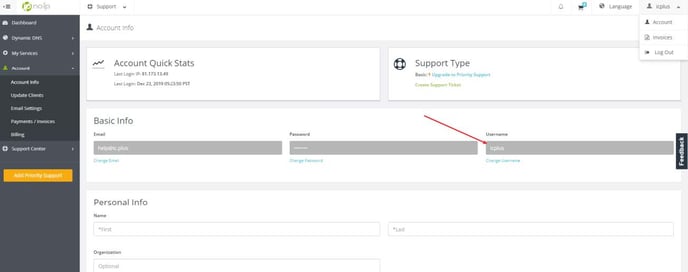
5. Once signed in > Click on your account settings > and input a username for your NOIP account.
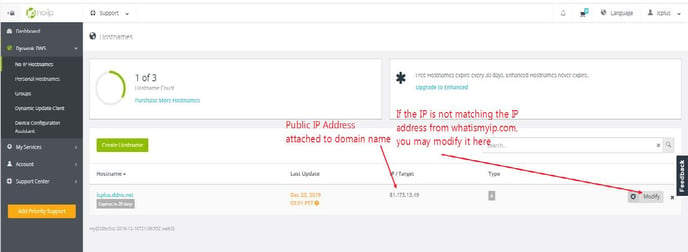
6. Click on Dynamic DNS on the left of the main menu and you will see your uniquely created DDNS name and attached IP address information. This IP is the Public/Global IP address of the internet router your DVR/NVR is connected to. You can check what your current IP address information is by clicking on the below link (Provided the computer you are using is connected to the same internet router) https://whatismyipaddress.com/
If the IP in the NOIP DNS record is different than what you see, modify it to the IP you see on https://whatismyipaddress.com/
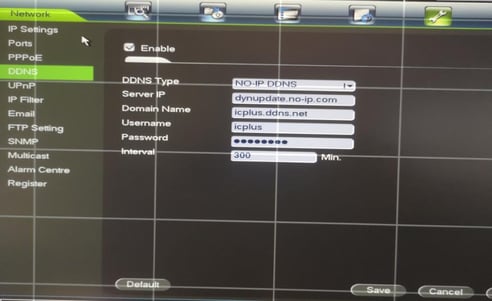
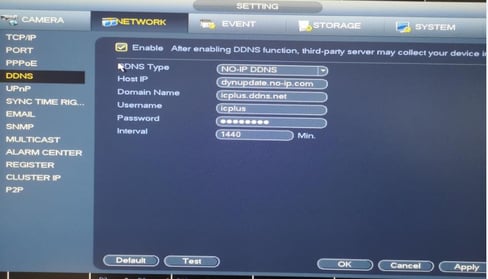
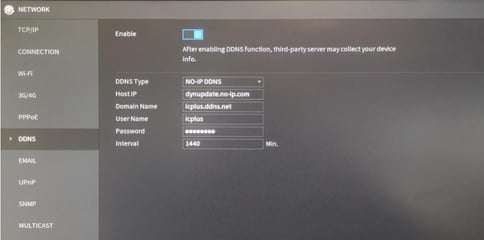
7. Now you will need to input the DDNS information into your DVR/NVR. You will need to go to Settings > Network > Most recorders will have a DDNS option on the left hand side of the screen. Click on DDNS, Select DDNS Type as NO-IP DDNS. Insert the domain name you created on the “Domain Name” line. Depending on firmware version, the menu may be any one of the below styles.
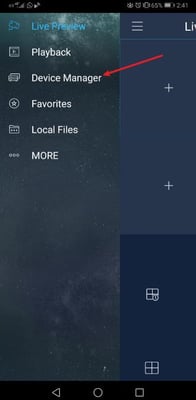
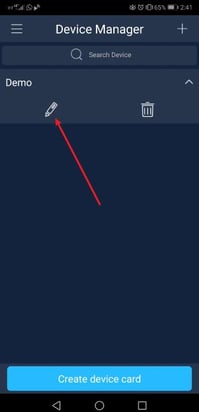
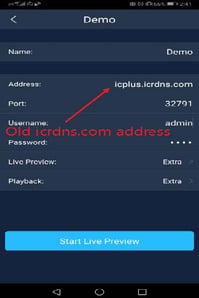
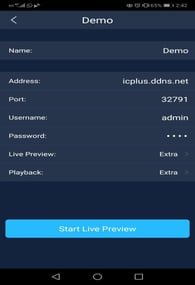
8. Lastly, you will need to update the DDNS address on your devices which connect to the cameras over the internet. On you mobile app, press the button in the top left hand corner and select device manager. Tap on the name of the “Away” device (This will be the option you use to view the cameras when away from the premises) and select the pencil icon. Change the Address line from the .icrdns.com address to the new domain name that was created on NOIP.com. Once you change the address, you should be able to press Start Live Preview and connect to the DVR on the new Domain Name.