Access the Tour Configuration
- Select: Main Menu > DISPLAY > Tour.
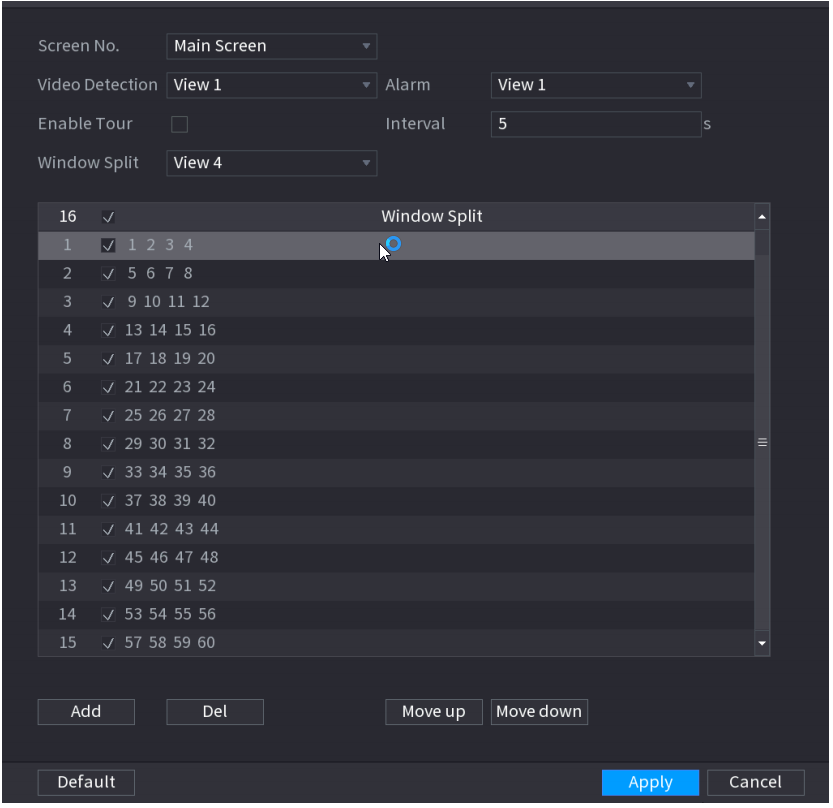
- The Tour interface will appear, allowing you to set up your channel groups and tour settings.
Configure Tour Parameters
- Configure the Tour Settings: Refer to the table below for the parameters you can set.
| Parameter | Description |
|---|---|
| Enable | Enable the tour function. |
| Interval (Sec.) | Enter the duration for which each channel group will be displayed on the screen. The value can range from 5 seconds to 120 seconds, with a default of 5 seconds. |
| Video Detect, Alarm | Select View 1 or View 8 for Motion Detect Tour and Alarm Tour (for system alarm events). |
| Window Split / Live Layout | In the Window Split list, choose View 1, View 4, View 8, or other supported split views of the device. |
| Channel Group | Displays all channel groups under the current Window Split setting. |
| Add a Channel Group | Click Add. In the pop-up Add Group Channel, select the channels to create a group, then click Save. |
| Delete a Channel Group | Select the checkbox of any channel group you wish to delete, then click Delete. |
| Edit a Channel Group | Select the checkbox of any channel group, then click Modify or double-click on the group. This opens the Modify Channel Group dialog box for regrouping channels. |
| Adjust Position | Use Move Up or Move Down to change the order of the channel groups. |
Save Your Settings
- After configuring the parameters, click Apply to save the settings.
Enabling the Tour Function
- On the Live View Screen:
- In the top right corner, use the left mouse button or press Shift to switch between
 and
and  to turn the tour function on or off.
- In the top right corner, use the left mouse button or press Shift to switch between