IC Realtime - How to Change the IP Address of a Device Using Config Tool
Learn how to update device IP addresses using Config Tool by selecting devices, entering a Start IP, and confirming settings.
How to Change the IP Address of a Device Using Config Tool
Step 1: Open Search Settings
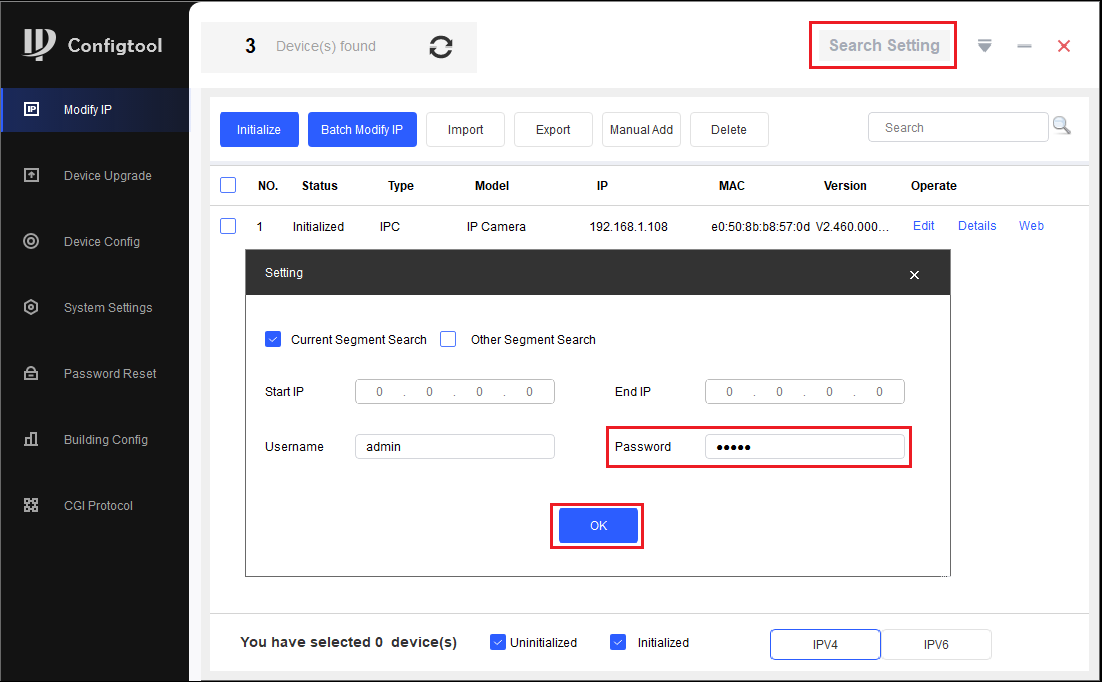
- Launch the Config Tool and go to "Search Settings."
- Enter the device password when prompted, then select "OK" to continue.

Step 2: Select Devices for IP Modification
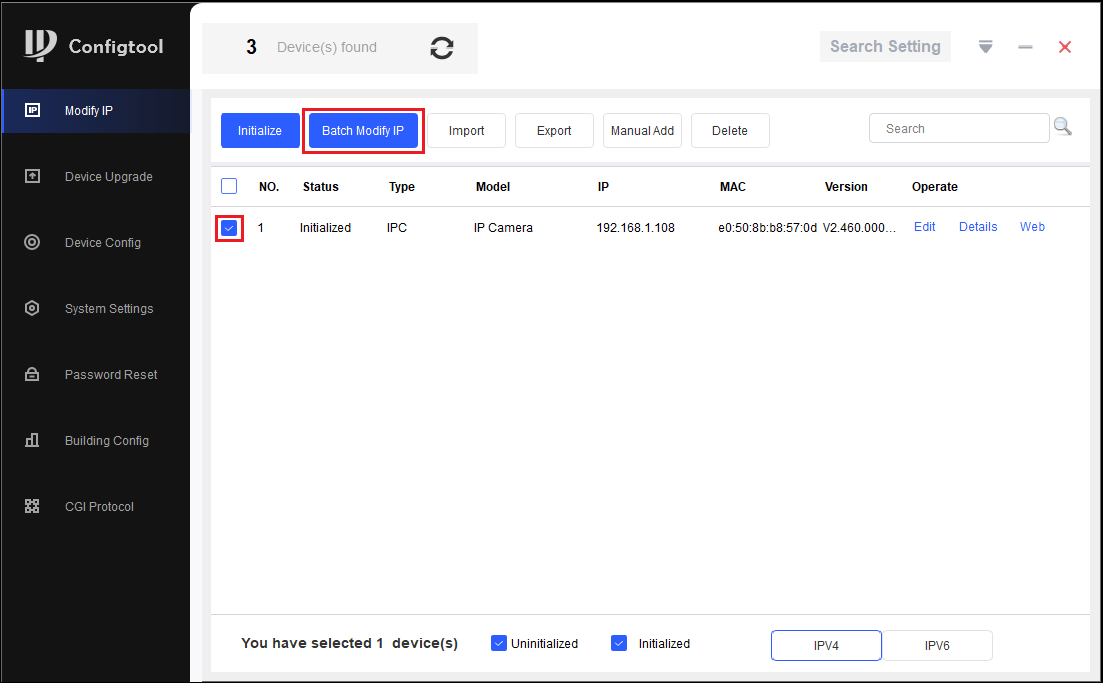
- In the device list, check the box next to the device(s) whose IP address you wish to change.
- Click on "Batch Modify IP."

Step 3: Enter Network Details
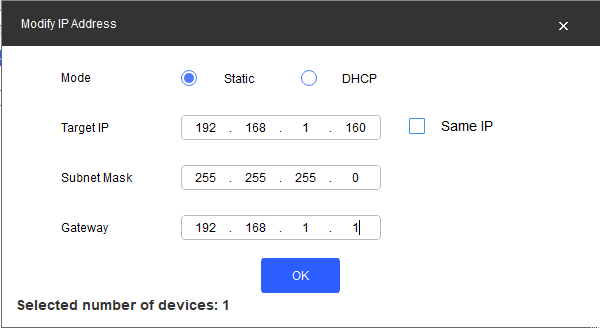
- Input the desired Start IP address, Subnet Mask, and Default Gateway for the selected devices.
- Example: If your Start IP is set to 192.168.1.160, the first device will receive this address. Any additional devices will be assigned incrementally (e.g., 192.168.1.161, 192.168.1.162, etc.).
- Once all details are entered, click "OK."

Step 4: Verify IP Address Update
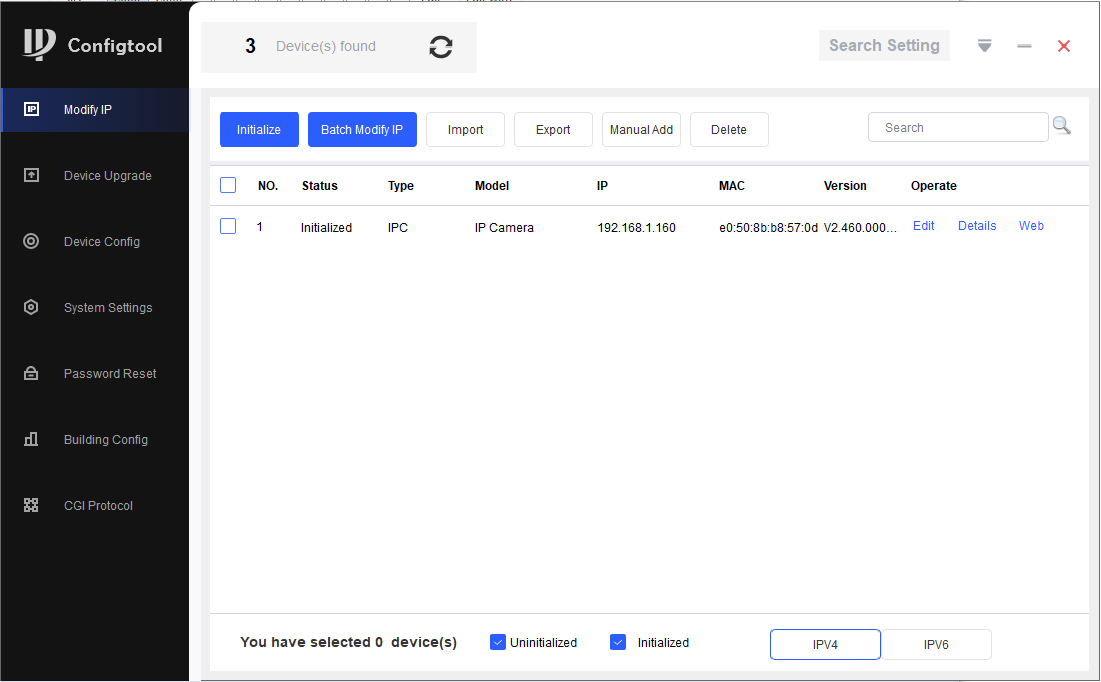
- The IP addresses should now be updated for each device.
- If any issues occur, double-check the password in Search Settings and ensure all IP details are entered correctly.
