What Is Active Defense?
Active Defense is a proactive security feature available on compatible VIGI IP cameras. It uses AI-based detection to identify threats — such as intrusion or loitering — and immediately triggers deterrents including flashing lights, voice warnings, or sirens. The goal is to stop incidents before they escalate rather than simply recording them after the fact.
The VIGI NVR cannot perform Active Defense on its own. At least one compatible VIGI IPC (IP camera) must be connected and configured — the camera is what detects threats and triggers the deterrents.
Requirements
- VIGI NVR Must be a model that supports Active Defense. Check your NVR's firmware and datasheet on the product support page to confirm compatibility.
- VIGI IPC (camera) At least one connected VIGI IP camera that supports Active Defense. The camera handles AI detection and triggers the physical deterrents.
Recent firmware updates may have expanded Active Defense support to additional models. Visit your product's support page and check the firmware section for the latest improvements.
Configuration via Web Interface
Active Defense can be enabled and configured directly through the NVR's web management interface. Follow the steps below.
-
1
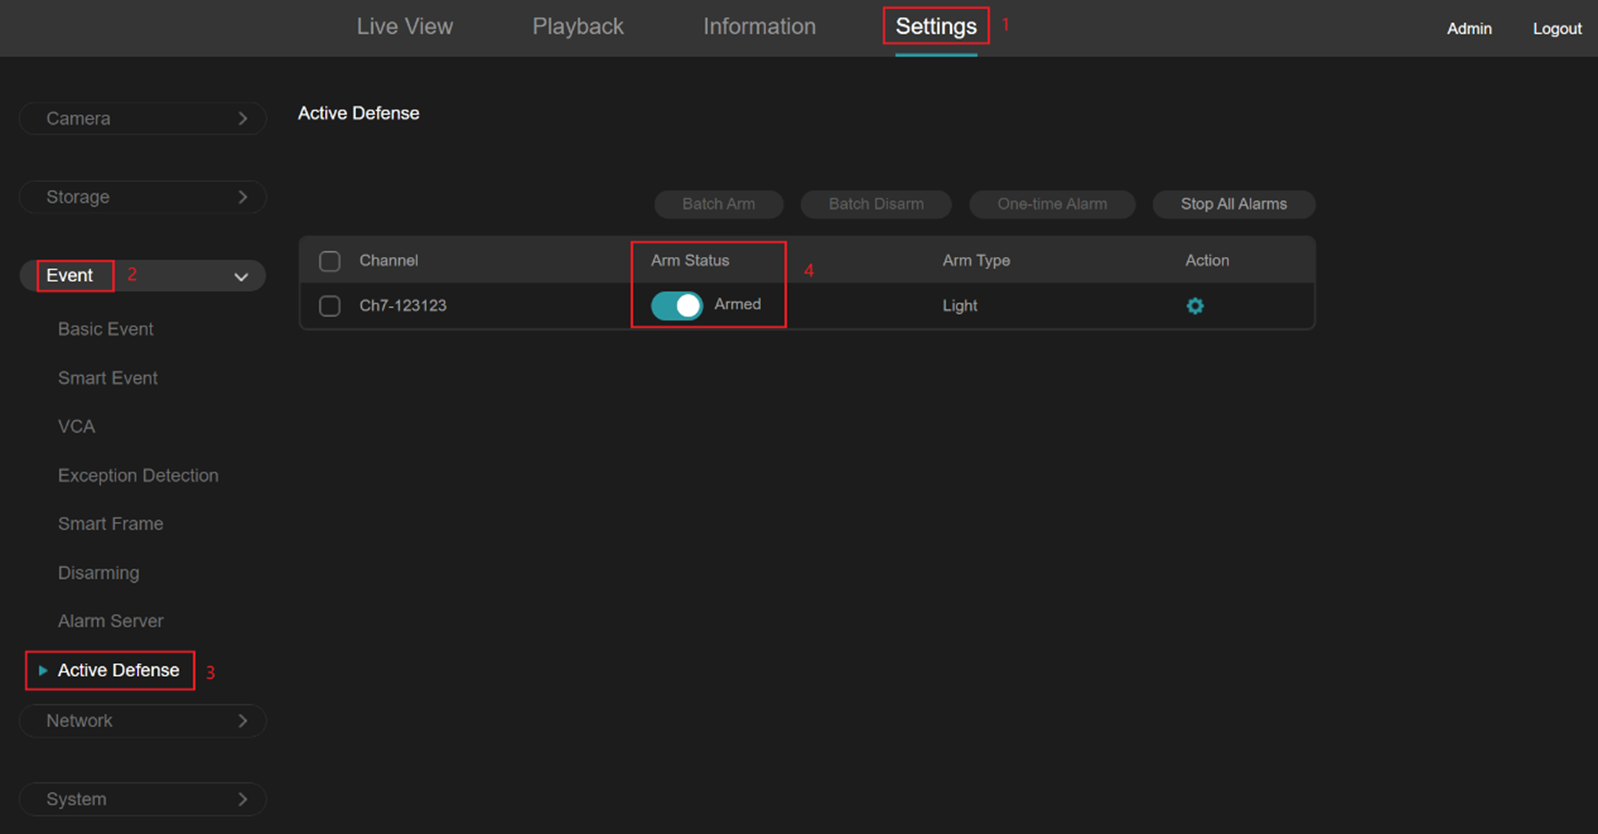
Enable Active Defense. Go to Settings > Event > Active Defense and toggle the arm status on for the desired channel.
-
2
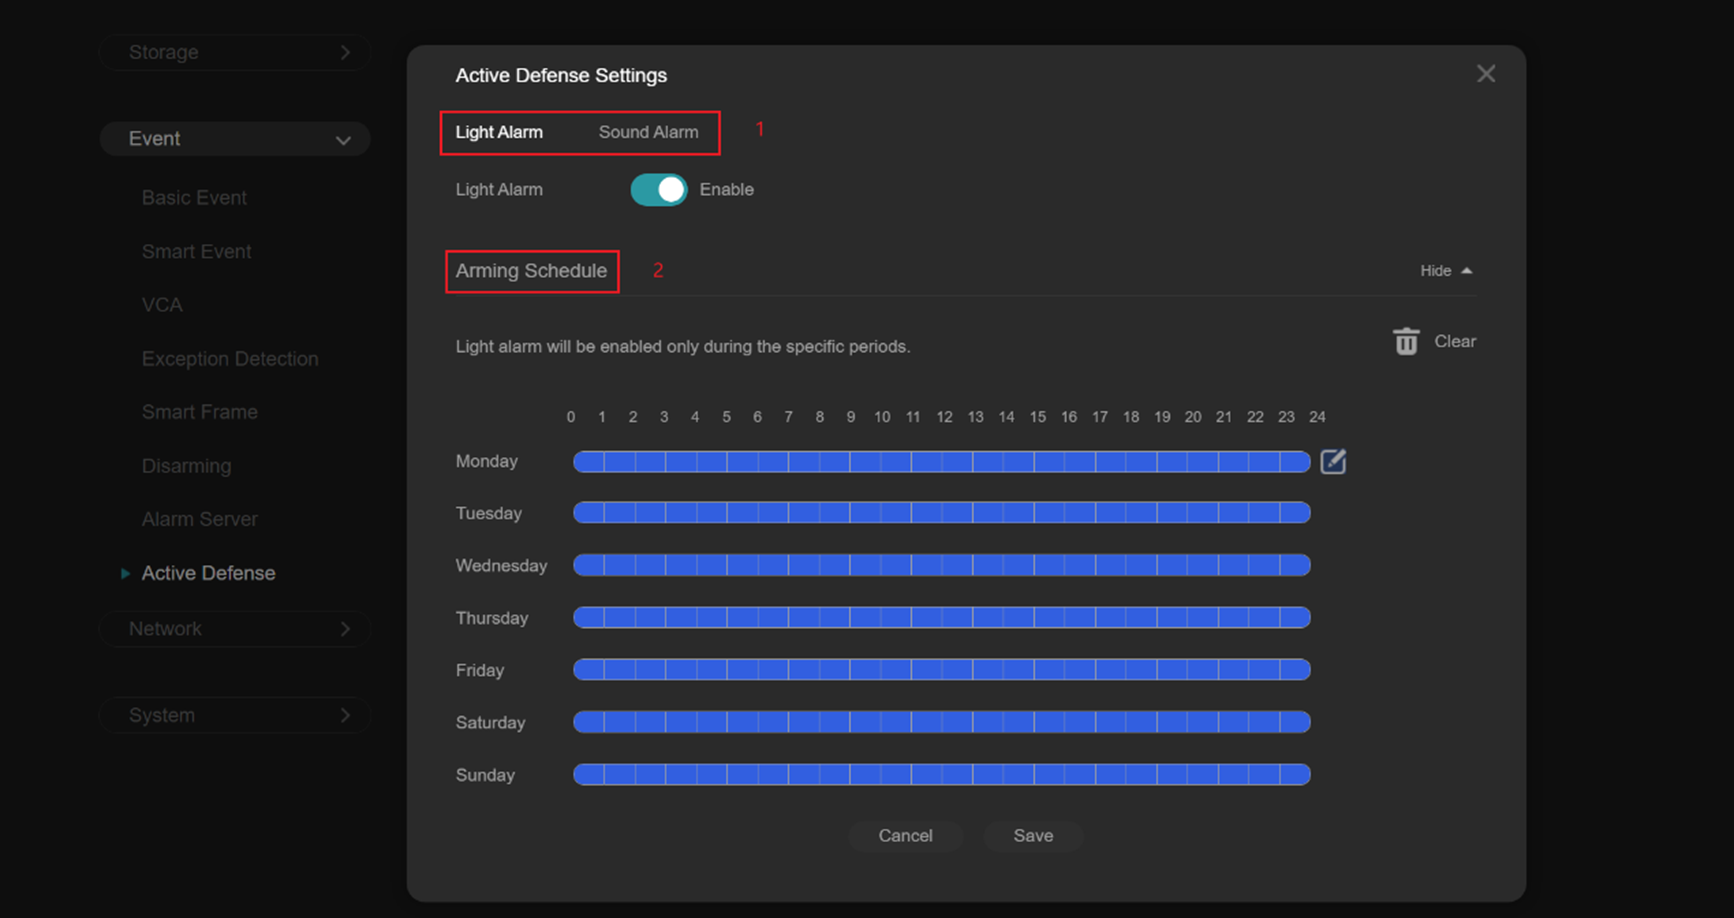
(Optional) Configure detailed settings. Click the gear icon next to the channel to open advanced options. Here you can select the alarm type (e.g. flashing light, voice warning, siren) and set a timetable to control when Active Defense is active.
Configuration via VMS
Active Defense can also be configured through VIGI's Video Management Software (VMS) for users managing cameras centrally from a PC.
-
1
Enable Active Defense. Log into VMS and go to Settings > Event > Active Defense. Toggle the arm status on for the desired channel.

-
2
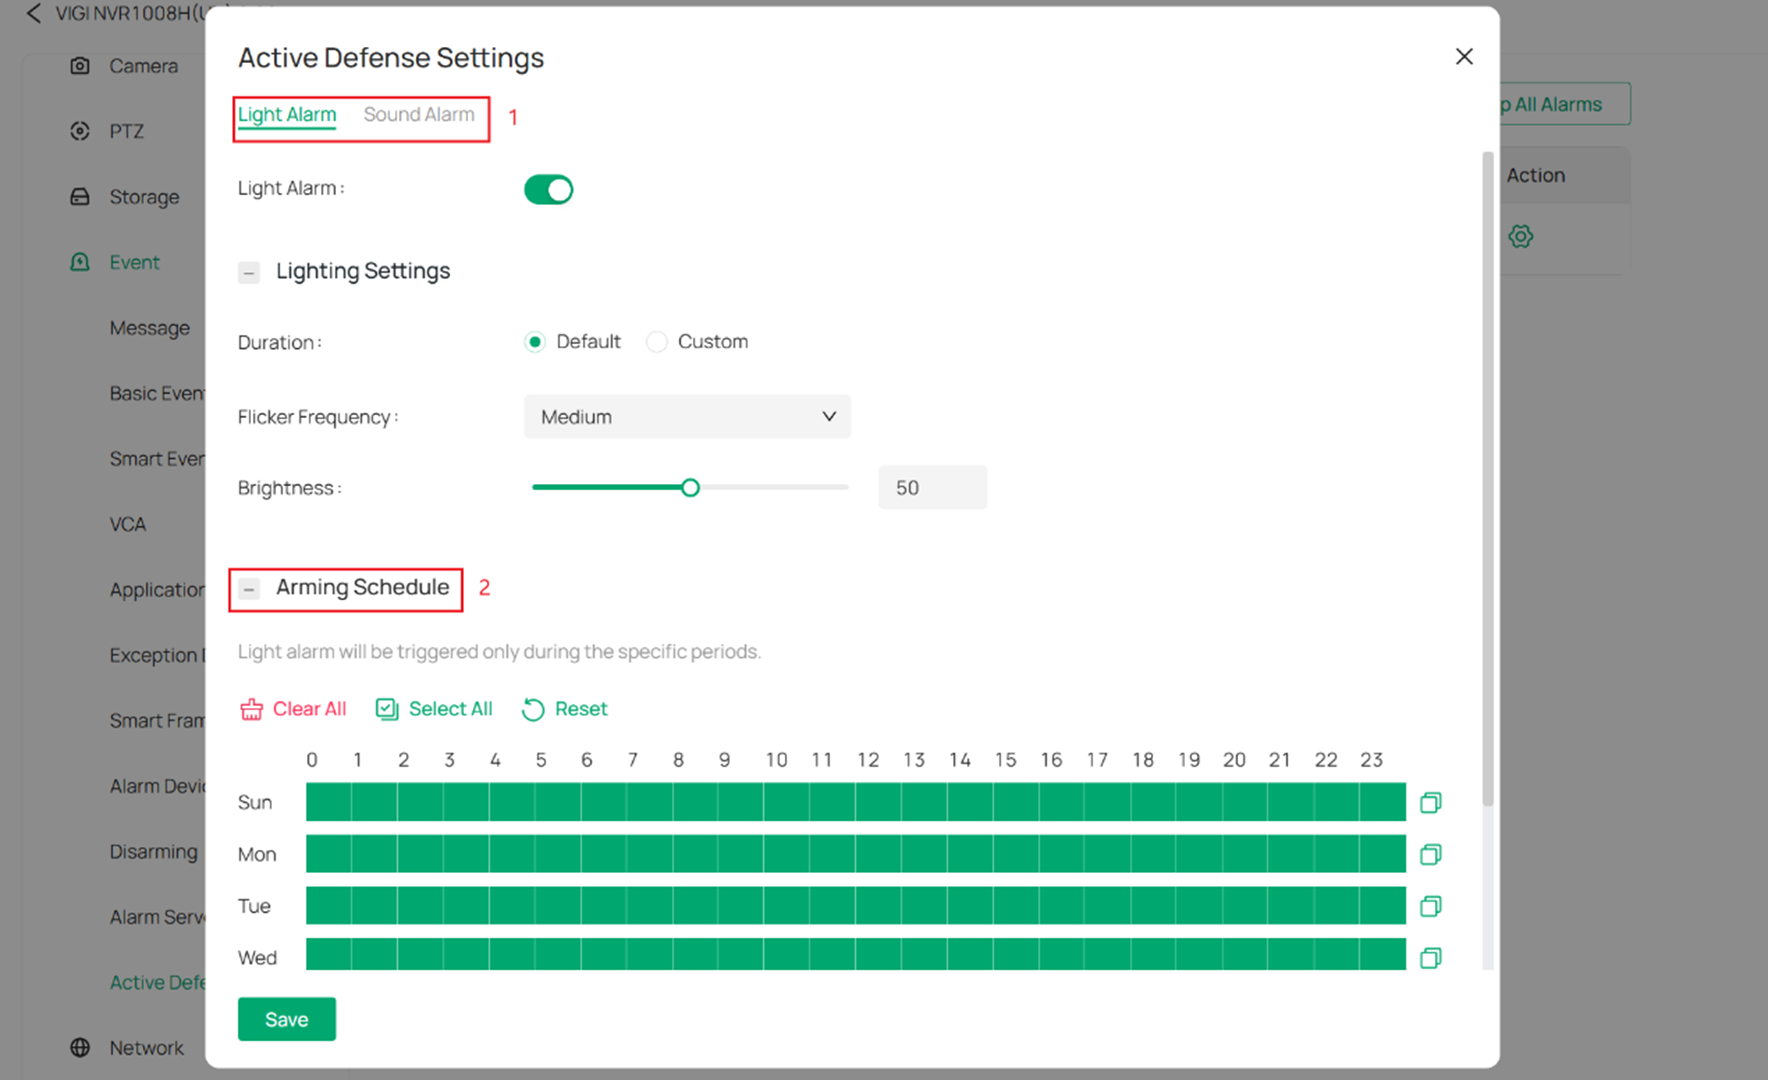
(Optional) Configure detailed settings. Click the gear icon to access advanced options. Select the alarm type and configure a timetable to schedule when Active Defense runs.
Both configuration methods — web interface and VMS — offer the same options. Use the web interface for quick access to a single NVR, or VMS if you are managing multiple cameras and recorders from one place.
Sources & related guides
Original article: tp-link.com/us/support/faq/4641
VIGI NVR product range: tp-link.com — VIGI Network Video Recorders
TP-Link Download Center (manuals & firmware): tp-link.com/download-center
TP-Link Community (Business): community.tp-link.com/en/business/forum/584