Dahua - White Light Camera - How to turn off the white light LED
This guide will illustrate how to disable or adjust the white light on Dahua cameras through the XVR.
Numerous users may desire to deactivate the white lights (IR LED lights) on Dahua cameras, either because their environment is well-lit, or they seek discreet operation. Additionally, we'll provide instructions on achieving this adjustment directly on the camera. Please be aware that these instructions are tailored for HD-CVI cameras.
Please bear in mind that both the white light and IR lights serve a crucial role in helping the camera capture images under low-light conditions.
When darkness falls, the IR lights activate automatically, allowing the camera to record images in black and white. If you choose to deactivate the white lights and the area lacks sufficient illumination, the resulting footage may appear completely dark
Disable the IR LED lights on Dahua cameras
Connect the camera to the DVR and access the Live View screen, where you'll find the camera displayed, as indicated in the screenshot.
Next, access the OSD (On-Screen Menu), which is an additional menu embedded in the camera's chipset. The OSD provides several options within the camera's internal software, including the ability to deactivate the IR lights.
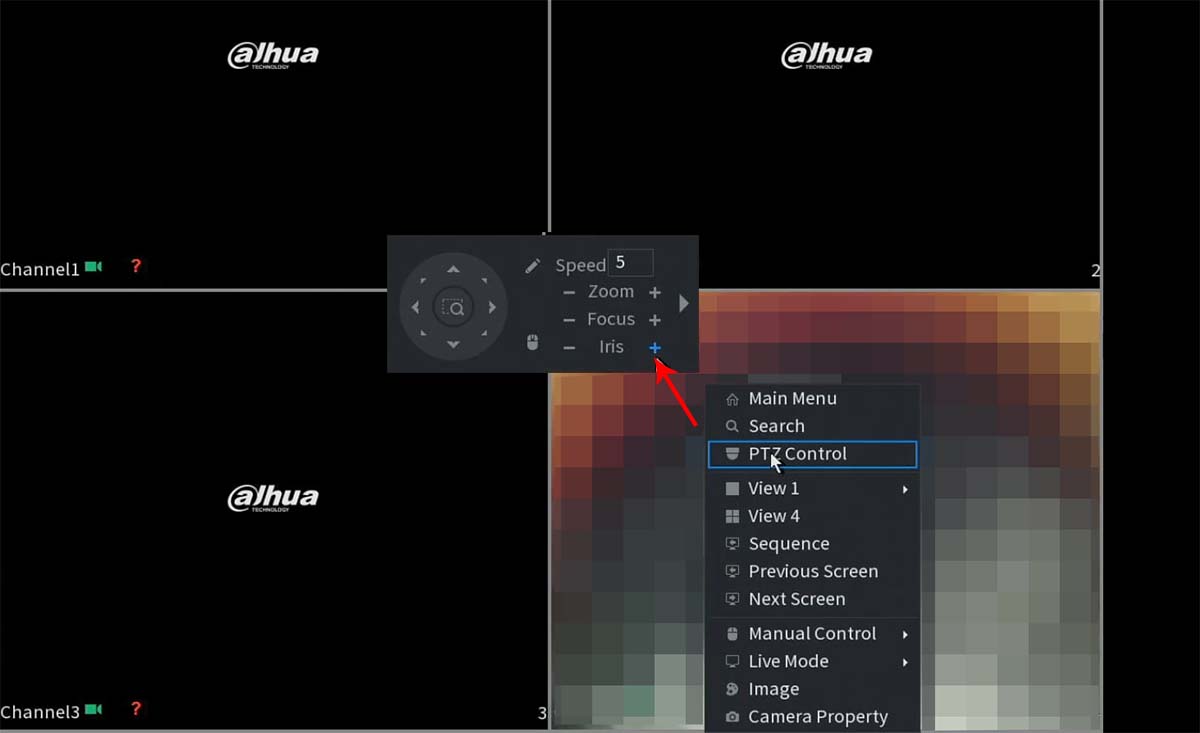
To access the OSD menu, simply right-click anywhere on the screen using the mouse. Then, select "PTZ menu," and in the subsequent menu, click on the + sign located in the Iris section at the bottom right corner of the screen. This action will reveal the OSD menu on the camera's display.

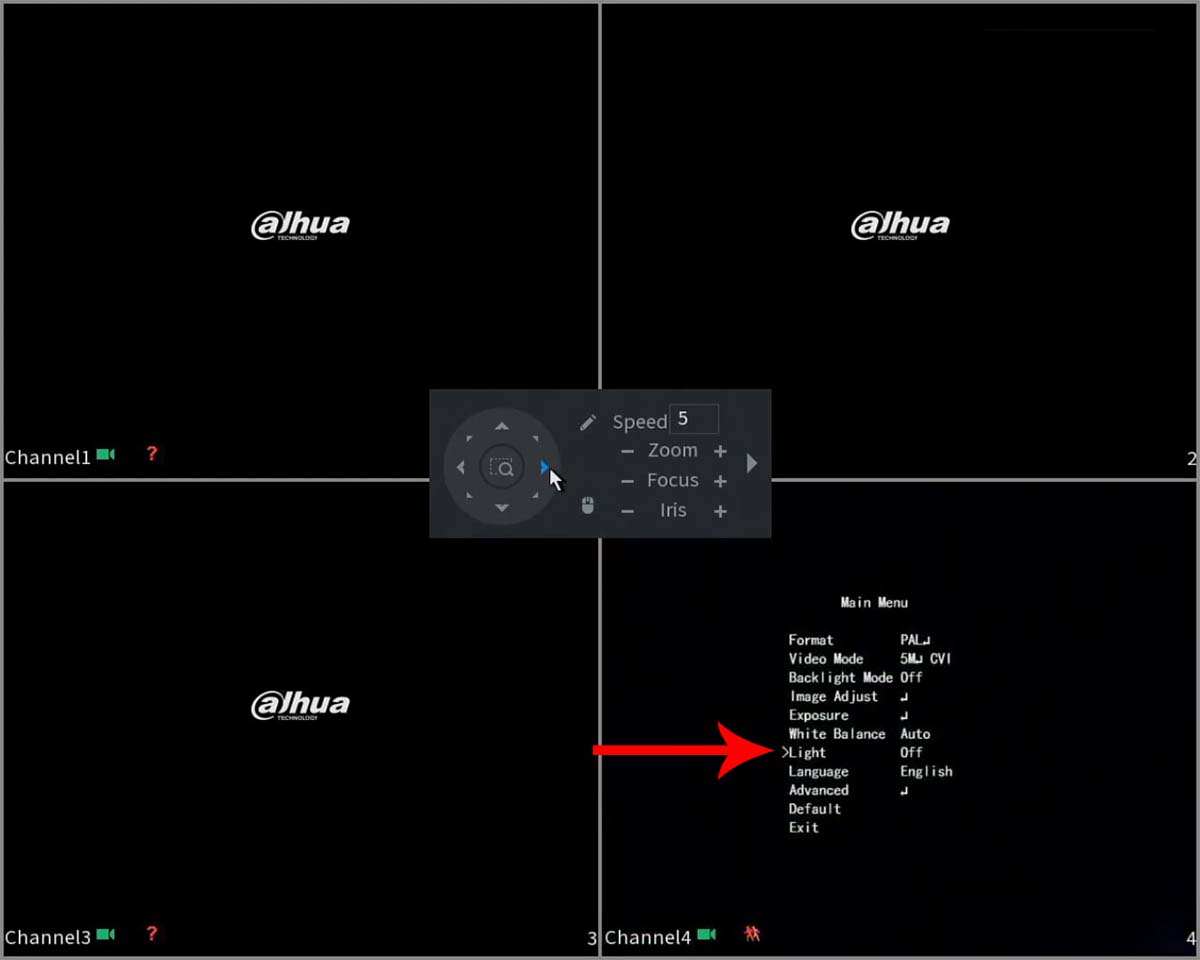
One of the lines in the OSD menu displays "Light: Smart Light," and this is the option we need to deactivate. To do this, use the menu's DOWN or UP button to navigate to the "Light" option.
To turn off the Smart Light feature, press the RIGHT button on the menu. This action will switch off the IR lights on the camera. You can also think of the RIGHT and LEFT buttons as functioning like a knob; if you wish to activate the lights again, simply continue clicking the RIGHT button.

Once you disable it, the screen will display a pitch-black image (in nighttime conditions) or show some visibility if there is sufficient ambient environmental light.
Adjust Brightness and Sensitivity
Using the menu, you have the flexibility to fine-tune various camera settings like Brightness and Sensitivity.
To do so, navigate to the Light option using the arrow buttons (up-down), press the + Iris button (which functions as "enter"), and you will access the Level and Sensitivity modes.
Modify these settings to align with your preferences. For example, you can set the Sensitivity to 1, causing the camera to activate the lights only in truly dark conditions.
Remember to exit the menu and save your settings. Once the OSD menu disappears from the screen, your adjustments are complete.
We recommend making these adjustments during the nighttime, as it allows you to fine-tune the settings effectively and monitor the changes on the local display.