This guide explains how to configure the E-Map feature and use the Map Track function on Dahua NVRs running UI 5.0. E-Map allows you to place cameras on a floor plan or site map for visual reference during live monitoring. Map Track works alongside AcuPick to display search results as a visual trail across your maps during playback.
This feature requires a Dahua NVR running UI 5.0 with E-Map Live and Multi-Layer E-Map supported. For Map Track, the AcuPick function must also be enabled on both the channel and the NVR.
Configuring E-Map
-
1
Log in to the device. Access the NVR interface using your administrator credentials.
-
2
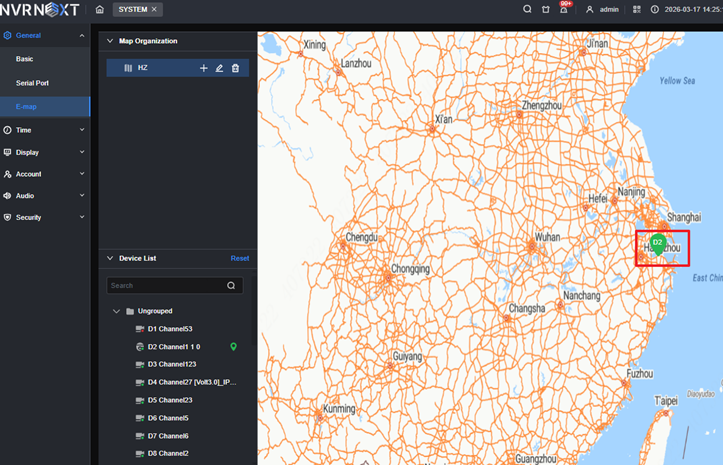
Open E-Map settings. Go to System > General > E-Map.

-
3
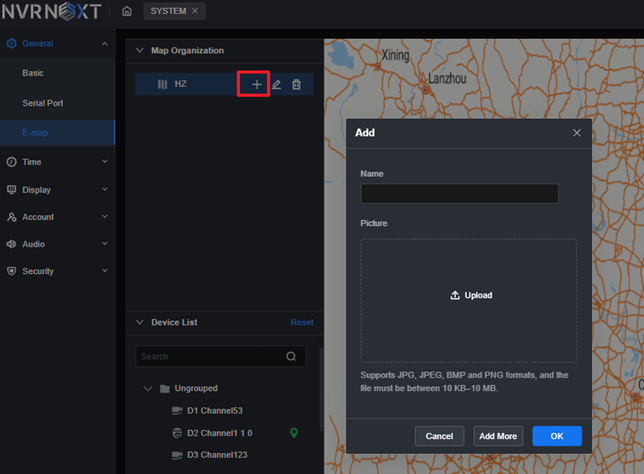
Add a root map. By default there is no map configured. Click the Add icon to create a root map — this is the base layer of your site layout.
-
4
Bind channels to the map. Select a channel from the left sidebar and drag it onto the map displayed on the right to position and bind it.
-
5
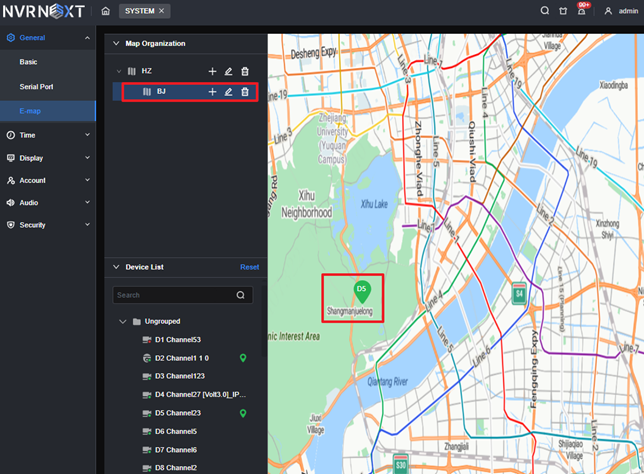
Add additional map layers. Click the Add icon to create more maps. Enter a name and upload a map image. You can then drag channels onto each additional map layer as needed — this is how multi-layer E-Map works across different floors or zones.
-
6
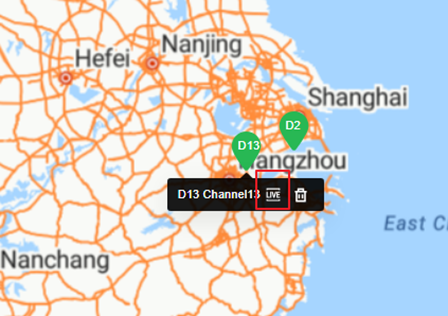
View live channel footage from the map. Click the Live icon on any bound camera pin to open a live view of that channel directly from the map.
-
7
Edit or delete maps. Click the Edit icon to modify a map's name or image. Click the Delete icon to remove the map entirely.
Using Map Track
Map Track uses AcuPick search results to visualise a subject's movement across your E-Map layers during playback. This is useful for tracking a person or vehicle across different zones or floors of a site.
AcuPick must be enabled on both the individual channel and the NVR before Map Track will return results. Confirm this in your channel and NVR settings before proceeding.
-
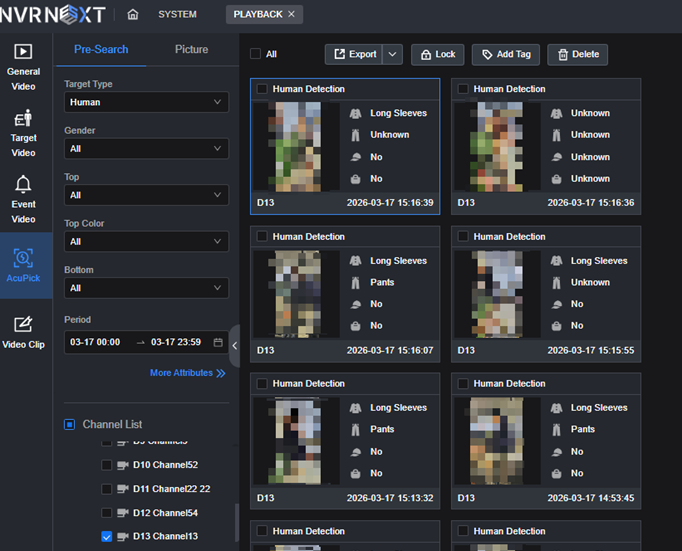
1
Run an AcuPick search. Go to Playback > AcuPick and search for the subject you want to track. Review the results returned.
-
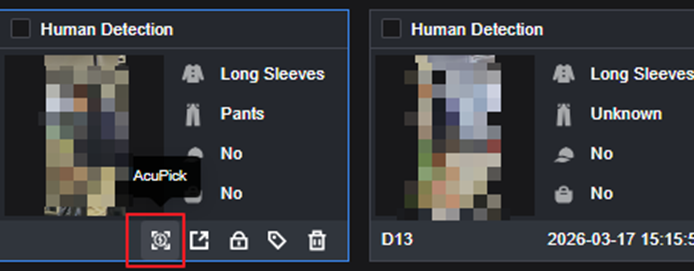
2
Select a result and open Map Tracks. Select one result from the AcuPick results list and click the AcuPick icon, then click Map Tracks to display the search results as a visual track across your E-Map.
-
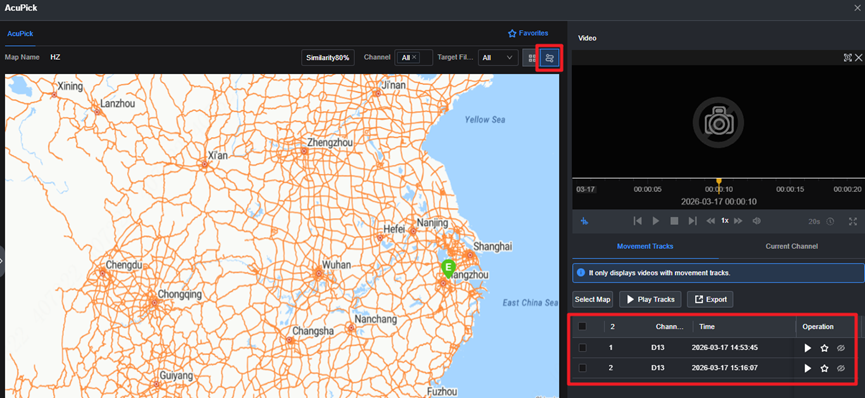
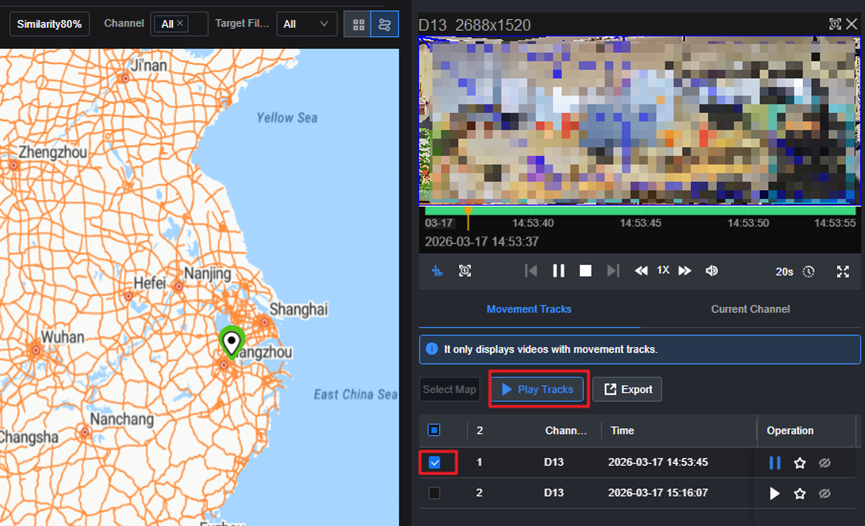
3
Play back the track. Select a track point from the list and click Play Tracks. The playback area in the upper-right corner will play the recorded video clips in chronological order. If an event occurred on a different map layer, the system will automatically switch to that map for playback.
When using multi-layer maps across multiple floors or zones, Map Track will automatically switch between map layers as it follows the subject's path — no manual switching is needed during playback.
Sources & related guides
Dahua support portal: support.dahuasecurity.com
Dahua product page: dahuasecurity.com